Tricia was in the kitchen the other day and heard some rustling noises coming from the kitchen cabinets under the sink. Uh oh! She went and got Ginger, our cat. I have to be honest, I am not a cat person. Even though she is our pet, I've never really warmed up to her. Cats are so independent and not very friendly.
However, Ginger was created for such a time as this. Now was her moment to redeem herself and prove herself useful. She was created to hunt and kill mice. It is Ginger's big opportunity. Tricia showed Ginger in and she smelled the mouse. The cabinet was opened and the trash can tipped over, exposing a mouse that had come in. Ginger quickly caught the mouse, batting it around with her paws in playful, but serious. motions.
Instead of killing the mouse, Ginger opted to play with it. Sensing an opportunity for escape, the mouse darted out from between Ginger's paws and darted quickly underneath the dishwasher. What a faux pas, Ginger! Ginger is in the "dog house."
Looking closely under the sink, we can see where mice have eaten holes in the sheet rock around the receptacle on the bottom right...
Not only there. Look above the white PVC pipe and around the water line. More holes in the sheet rock! Not good. I don't want a mouse in the house.
If Ginger the cat wasn't going to do her job, we'd go another route. We purchased some glue traps, dropped a dollop of peanut butter and put it under the cabinet. The next morning we had achieved some success, catching this little mouse in the sticky trap.
What an ignominious fate for the stealthy mouse that had evaded death at the hand of Ginger the cat only to succumb to getting stuck in a glue trap.
Where there is one, there may be two. We put more peanut butter in the trap and put it back. A few hours later Ginger came back in the house. Benjamin was sitting in the den when he noticed Ginger coming in carrying a glue trap with a mouse stuck in it. Ginger was proudly showing off as if to say, "Look what I did!" Actually the glue trap did all the work.
Make it your ambition to lead a quiet life and attend to your own business and work with your hands, just as we commanded you. - 1 Thessalonians 4:11
Showing posts with label peanut butter. Show all posts
Monday, February 17, 2020
Monday, October 3, 2016
Harvesting the 2016 Peanut Crop
I marked the date on the calendar so that I would know the exact date when the peanuts that we planted in back in early May would be ripe. A few years ago I waited too long and although we did harvest some peanuts, many of them had sprouted in the shell and were growing. I learned my lesson and strictly watched the calendar. When it was time - like it was last weekend - Benjamin went out and dug them up.
If the photo below looks like a jungle - it is. It is a jungle of peanuts and sweet potatoes. Digging up the peanuts without disturbing the sweet potatoes that had vined into the peanut rows proved to be quite a challenge, but we got the job done with a little patience. I'll say this, the peanuts were planted on the northernmost part of the garden, which is the highest. If they had been planted 15 feet to the south, they would have rotted in the ground during the August floods.
I think the blooms of a peanut are pretty. True to the "pea" part of their name, the peanut bloom looks just like the bloom of sugar snap peas, except the peanut blooms are yellow.
So how did we do? Well, we fared better than the first year we planted and about the same as last year. Harvesting on time really helped. There was only one peanut that had sprouted in the ground. We timed it perfectly this year. I was, I must admit, a little disappointed in the yield and I'm not sure what to attribute that too other than perhaps I need to incorporate some additional chicken litter into the soil?
As Benjamin and I dug up the peanuts, we placed them between the pickets of our picket fence to allow them to dry out.
When rains threatened two days later, I moved them into the garage and hung them beneath "The Garfish," our canoe to continue drying.
Just looking through the soil, I rescued a few 'stragglers' that broke off of the peanut pegs when we pulled them up. I left them on the lawn tractor in the garage to dry, but wouldn't you know it, a rat or some sort of predator ate this handful of peanuts!
That's okay, Benjamin and I still have a nice little bounty of peanuts. We'll roast them and make our annual batch of homemade peanut butter. Stay tuned for that project!
If the photo below looks like a jungle - it is. It is a jungle of peanuts and sweet potatoes. Digging up the peanuts without disturbing the sweet potatoes that had vined into the peanut rows proved to be quite a challenge, but we got the job done with a little patience. I'll say this, the peanuts were planted on the northernmost part of the garden, which is the highest. If they had been planted 15 feet to the south, they would have rotted in the ground during the August floods.
| Sweet potatoes on the left, peanuts on the right |
So how did we do? Well, we fared better than the first year we planted and about the same as last year. Harvesting on time really helped. There was only one peanut that had sprouted in the ground. We timed it perfectly this year. I was, I must admit, a little disappointed in the yield and I'm not sure what to attribute that too other than perhaps I need to incorporate some additional chicken litter into the soil?
As Benjamin and I dug up the peanuts, we placed them between the pickets of our picket fence to allow them to dry out.
When rains threatened two days later, I moved them into the garage and hung them beneath "The Garfish," our canoe to continue drying.
Just looking through the soil, I rescued a few 'stragglers' that broke off of the peanut pegs when we pulled them up. I left them on the lawn tractor in the garage to dry, but wouldn't you know it, a rat or some sort of predator ate this handful of peanuts!
That's okay, Benjamin and I still have a nice little bounty of peanuts. We'll roast them and make our annual batch of homemade peanut butter. Stay tuned for that project!
Wednesday, November 18, 2015
What Shall We Do With Our Homegrown Peanuts?
In This Post we planted some Schronce's Deep Black Peanuts in the garden.
In This Post we harvested them, and
In This Post we dried them.
Whatever shall we do with them now? Well, we will eat them, of course, but how? Benjamin and I decided that we would parch (roast) one tray to snack on and with the other tray, we would make homemade peanut butter. We always called them 'Parched Peanuts' growing up, but based on what I read, parched and roasted means the same thing.
Let's get the ball rolling. We poured the dried peanuts into two baking trays and positioned the peanuts where they were only one layer deep.
We preheated the oven to 350 degrees and put the baking trays into the oven, setting the timer for 25 minutes.
In This Post we harvested them, and
In This Post we dried them.
Whatever shall we do with them now? Well, we will eat them, of course, but how? Benjamin and I decided that we would parch (roast) one tray to snack on and with the other tray, we would make homemade peanut butter. We always called them 'Parched Peanuts' growing up, but based on what I read, parched and roasted means the same thing.
Let's get the ball rolling. We poured the dried peanuts into two baking trays and positioned the peanuts where they were only one layer deep.
| Two trays of peanuts |
| Lovin' in the oven |
About 18 minutes in, the house filled with a warm, soothing aroma of parched peanuts. I opened the oven door to check on them and that proved to be a mistake. The kitchen filled with a little smoke coming off the peanut shells. We didn't want them to burn, so I turned off the oven and pulled one out to test, while leaving the peanuts in the oven until the 25 minutes expired.
| Parched peanuts |
While some of the peanut shells look scorched, the peanuts inside were just fine, roasted, toasted, parched (or whatever you want to call them) to perfection! We snacked on a few and then decided to shell one of the trays to make peanut butter. The first thing you do is remove the peanuts from the shell. Then you remove the skins from the peanuts.
In the photo above and those following, the skins look black. They aren't burnt. These are Schronce's Deep Black Heirloom Peanuts. The peanuts themselves aren't black - the skins are.
| Removing the Shells |
Shelling the peanuts is the easy part. Removing the skins is the time-consuming step. Apparently, you don't want the skins in peanut butter. We removed them by rolling them around in our fingers until the skins came off.
| Benjamin skinning the peanuts |
While we got most of them, I'll admit that my patience was growing thin toward the end. Finally I told Benjamin, "Hey, look, I bet a few skins in our peanut butter isn't going to hurt anything." One baking tray of parched shell-on peanuts yielded just over a cup of (mostly-skinned!) nuts. They smell so good!
| Deez Nuts! |
Now comes the easy part. Simply put them in a food processor and add a little olive oil and kosher salt. Put the lid on the processor and pulse. Check the consistency of the peanut mixture and add more olive oil until you achieve the viscosity you are looking for.
| A little oil, a little kosher salt... |
In a few minutes of pulsing, we had achieved the pinnacle of peanut perfection. A dark brown roasted peanut butter ready to eat!
| Our work here is done! |
Now most store-bought peanut butter is light brown. Ours is very dark. I'm not sure why, but I assume the reasons are two-fold. First, our peanuts were parched, so the peanuts we used to make the peanut butter were darker in color. Secondly, the black-skinned peanuts I left in probably made color darker as well. Who cares what it looks like - it tastes great!
I took a butter knife and took a big mound of freshly made peanut butter and slathered it on top of a piece of bread:
Once I had spread it out evenly, it was time to eat. I gave a portion to Benjamin, a portion to Tricia, and I ate the rest.
| Peanut Butter Open-Faced Sandwich |
Delicious!! The one cup (plus a little bit) of peanuts yielded about a third of a pint of homemade peanut butter. I placed it in the fridge. Today I picked up some chocolate and I'll get out the homemade peanut butter, and...
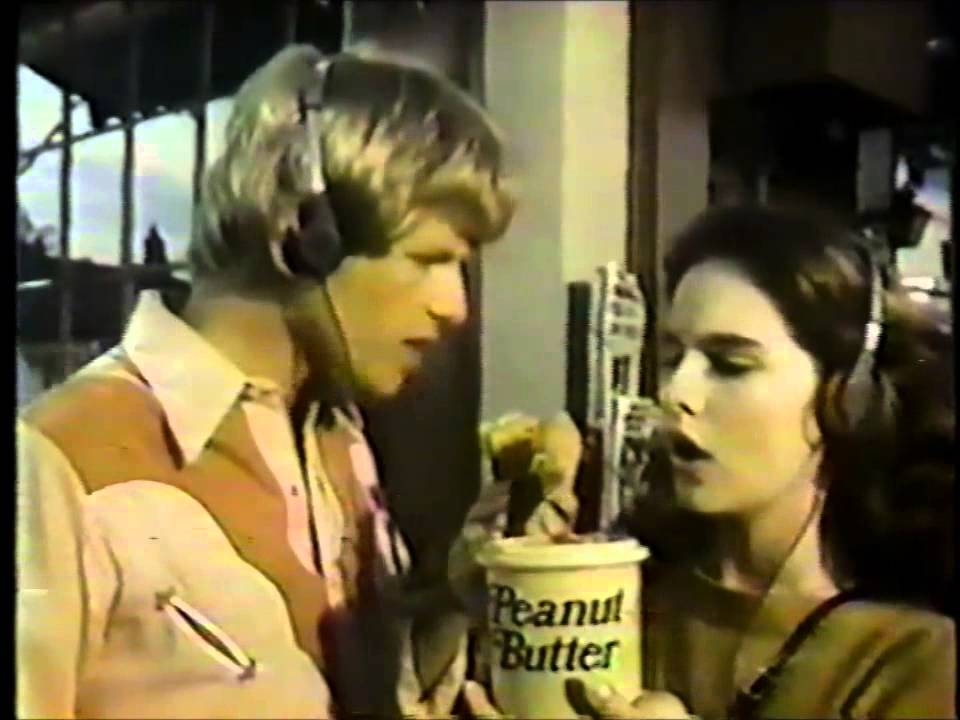
There used to be a commercial for Reese's Peanut Butter Cups where a guy eating chocolate ran into a girl eating peanut butter. "Hey, you got chocolate in my peanut butter!" "Hey, you got peanut butter in my chocolate!"
![]() |
| Image Credit |
I'm going to recreate that commercial tonight. That sounds good right about now!

Friday, March 6, 2015
Making Homemade Peanut Butter from Homegrown Peanuts
Last year we told you about planting a new crop in the garden in This Post. Schronce's Deep Black Peanuts. It was the first time that we've planted peanuts and Benjamin and I were excited about it. Since we were unfamiliar with growing peanuts, I researched and got some bad information on when to harvest and I explained it in This Post and showed our sad little yield of peanuts. Jimmy Carter, I am not!
Anyway, after drying them, I brought them inside and have stored them. The other night while shelling pecans in front of the fireplace, I remembered the peanuts and figured that tonight was the night that we would roast them. Roasting peanuts is simple. Simply heat an oven to 350 degrees and put the peanuts on a tray for 20 - 25 minutes, stirring every so often. Our house was filled with the most appetizing aroma ever!
Remove from the oven and cool completely. We decided that we wanted to make our own Roasted Peanut Butter! To do so, you need to crack open the shells and remove the peanuts. You can see why this variety is called Shronce's Deep Black Peanuts - they are black versus red like normal peanuts.
Anyway, after drying them, I brought them inside and have stored them. The other night while shelling pecans in front of the fireplace, I remembered the peanuts and figured that tonight was the night that we would roast them. Roasting peanuts is simple. Simply heat an oven to 350 degrees and put the peanuts on a tray for 20 - 25 minutes, stirring every so often. Our house was filled with the most appetizing aroma ever!
| Peanuts roasting in the oven |
To make peanut butter, you want to remove the skins of the peanuts. This is easy. Just rub between your fingers and the black skins come off leaving a golden brown, roasted peanut.
| We have some skin in the game |
Benjamin helped me and when we were done, we had a small bowl of skinless, boneless, roasted peanuts ready to be processed.
| Future Peanut Butter |
We were left with a tray of peanut shells and skins and we'll compost this. We compost most everything, putting all organic material back into the soil, ensuring that we're returning as much nutrients that we're removing each crop year so we're never at a deficit.
| To the compost pile |
My mom taught me the following song when I was a little boy that I'm sure she learned from her mom:
Instead of using a train, we're going to use another device to make peanut butter. We don't have fancy equipment - just a simple Black & Decker food processor and we'll make use of that to make our peanut butter.
A peanut sat on a railroad track,
His heart was all a-flutter.
The five-fifteen came rushing by--
Toot toot! Peanut butter!
Instead of using a train, we're going to use another device to make peanut butter. We don't have fancy equipment - just a simple Black & Decker food processor and we'll make use of that to make our peanut butter.
| Pour the peanuts in |
We turn it on an pulse continuously for a minute. The peanuts look sort of like coarse ground grits at this point.
Then we pulse for another minute. Now the peanuts are starting to 'clump' together. Almost, but not quite peanut butter.
We pulse for another minute and then we scrape down the sides and add a teaspoon of honey and a sprinkling of kosher salt.
| Honey & Salt added |
We pulse that for another minute and then use a rubber spatula to scrape the processor clean and into a bowl for consuming. Due to our small harvest, we could have probably sat around in front of the fireplace with spoons and finished it off, but it was so good, we wanted to ration it.
| Homemade Peanut Butter - the finished product! |
We snacked in front of the roaring fireplace on the richly flavored, smooth, roasted peanut butter and when we each had several spoonfuls, I sat it on the counter next to the 48 ounce container of pecans I had just shelled.
| Hmmmm..... |
And had an idea. If peanut butter is this delicious, what if we roasted pecans and processed them to make Roasted Pecan Butter??? Hmmmmm... Standby for a future post about that project. It's on the list of things to do!
Subscribe to:
Posts (Atom)