Showing posts with label jelly. Show all posts

Monday, July 31, 2017

The Grapes (Muscadines) of Wrath

“A large drop of sun lingered on the horizon and then dripped over and was gone, and the sky was brilliant over the spot where it had gone, and a torn cloud, like a bloody rag, hung over the spot of its going. And dusk crept over the sky from the eastern horizon, and darkness crept over the land from the east.”
― John Steinbeck, The Grapes of Wrath
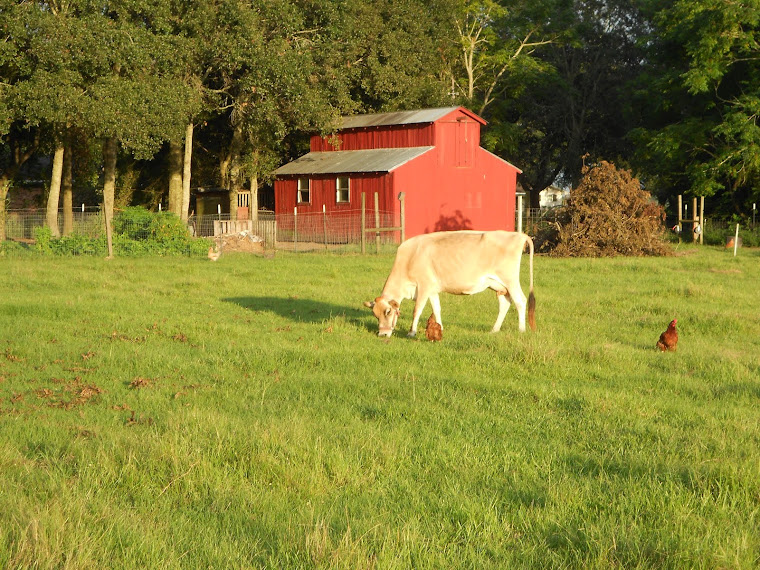
Tricia and I, in our late afternoon routine, hands and walk the property line, stopping each day to inhale deeply the fragrant new crisp white magnolia blossoms. If there is a fresher fragrance, I haven't found it.  We'll comment on the fruit on the trees and admire the bright pink blooms of the crepe myrtles.  We'll pass by the pasture and comment on the cows eating grass with their heads down and how nice and carefree it must be to be a MILK cow as opposed to a BEEF cow.

On the west side, we stop by the vineyard.  Okay, I'm exaggerating a bit.  We have a muscadine vine that is loaded down with grapes.  We'll pick about a pint of them each day as the ripen gradually in the summer sun.  The purple ones are the best.


There are plenty green ones right behind the ripe ones, ensuring that we'll enjoy muscadines for days, or maybe weeks, to come.


Each year the vine encompasses a larger portion of the cattle panel upon which they grow. The ground is not particularly rich in this area of the yard, but the muscadine doesn't seem to mind and ekes out its existence on the poor soil, providing us grapes to snack on each summer.  

We pick them each day so that the birds don't get to them first.  Sometimes we eat them right off the vine, their juice warm from the sun and buttery to the taste. They are full of seeds, though, and keep you spitting.  The skins can be a little tart at times, but we still enjoy them.  Everyone needs a muscadine vine.


Each year I keep thinking about making some muscadine jelly, but we always end up eating them all before the jelly-making commences.  Next year we make jelly!

Thursday, May 18, 2017

Checking In On the Muscadines

Back in May 2014 we planted a muscadine vine out in the side yard.  It has grown and we pick muscadines off of it each year.  The yield seems to increase every year. Last year Russ taught me how to effectively prune it to maximize production.  It seems to be pretty happy despite the fact that the soil in the side yard is poor and compacted.  If you dig with a shovel, it is like digging in a parking lot - hard and packed earth.  I've been amending the soil and will continue to do so until I get it where I want it to be.


Meanwhile we are still going to get a nice crop.  I like to make jelly with the muscadines.  Tricia likes to come out to the "vineyard" on late summer afternoons and eat muscadines right off the vine when the fruit is sun-warmed.  Delicious!  I guess if there is a downside to these, it would be that they have many seeds and you have to spit a lot.  Back in THIS POST FROM 2013 I chronicled how we made new wine with some grapes from our neighbors.  If we have a nice enough harvest, I'd like to try to make a batch of new wine with muscadines and see how it would turn out.


This year I've found a recipe to make muscadine syrup and I'm going to try that.  It seems like topping a homemade blueberry and pecan pancake with muscadine syrup.  Forget Wheaties.   That, my friends, is the breakfast of champions!
Clusters of Muscadines
Stay tuned and later this summer, I'll post how the muscadine syrup making experiment goes.

Monday, March 27, 2017

Plan B for Blackberries

After milking chores were done Saturday morning, Tricia and I had a good cup of coffee on the front porch.  There was a thunderstorm blowing in from west to east and we watched while the rain fell against the newly plowed field.  It was peaceful and relaxing to watch the much-needed rain and wind blow through.  We sat and watched it until the rain started getting us all wet.  Then we went inside.

In the photo you can see the field on the other side of the road.  That outside levee was our wild dewberry patch.  They would come up every year and we'd go out to the ditch with buckets and pick them.  We would come back and make Dewberry Jelly.  We've posted about it HERE.  With the field being plowed up, we waved farewell to our wild dewberry patch.  Well, it wasn't really "OURS," was it?


But we weren't giving up without a fight.  I called Russ and it just so happens that his Horticulture Club at LSU was having a plant sale.  Wouldn't you know it?  In addition to vegetables, herbs, and trees on sale, they were selling berries - blackberries, in particular.  The specific variety he selected for us to try was the Arapaho Thornless Blackberry.  These were developed by the University of Arkansas.  If they produce, even though I'm an LSU Tiger, you may hear me "Call the hogs!"

Russ purchased two for us to try.  The directions said to dig a hole twice as big as the root ball, place it in the hole, backfilling with compost and watering to remove air pockets.


Benjamin and our nephew, Mike, helped plant them and then mulched with hay. The cows provided moral support.


We watered them in good and now we'll just watch them grow.  They are planted right by the muscadine vine trellis.  The Arapaho thornless blackberry can be grown on a trellis, but don't have to be.  I read where they produce berries on second year canes.  If that means what I think it means, we won't have blackberries until next year.  That's okay as we still have a good inventory of blackberry jelly in the pantry.


The other interesting thing I read about them is that cuttings can be taken off of them and rooted very easily.  We may need to do exactly that to get enough blackberries to make jelly.  We'll see how things go.  After thinking about it, it looks like we have a good blueberry crop coming along this year.  Perhaps we can make some Blueberry Jelly this year instead of Blackberry Jelly?

Saturday, May 31, 2014

Making Dewberry Jelly - May 2014

As I checked the inventory of Dewberry jelly in the pantry, I noticed that we have one half pint and one pint left.  It's time to stop fooling around and make some more jelly. It would be tragic to have homemade biscuits with no jelly in the house.  In previous posts, we showed you the really nice dewberries that we picked right in front of the house.  They were plump and juicy and should make some nice jelly.

Delicious Dewberries
We also showed you in earlier posts how we individually freeze the berries to allow for easy pouring or measuring out just what you need.  The recipe calls for 12 cups (or 6 pints) of berries, so I filled up measuring cup full, ensuring that I had enough.  The photo below is a little misleading.  It only held 4 pints, so I measured out 2 pints in another measuring cup and poured them on top.

6 pints of frozen dewberries
Now while I'm doing everything else, I'll put all of the rings, lids, and gaskets in a pot of water on the stove top and sterilize them.  I'm using the Tattler Brand lids  that you can use over and over again.  They were a little tricky at first, but now I like using them.

Sterilizing the lids, rings, and gaskets
We pour the 12 cups of berries into a large saucepan on the stove and add 1 cup of water.  Turn up the heat and bring them to a boil.  Now here's where the fun part comes in.  Get a potato masher and vigorously crush all the berries.  Just keep mashing and crushing until you have a pretty purple concoction.  It smells real fruity and nice.  Keep stirring.  Once it has come to a boil, turn the heat down to medium, put the cover on and simmer for 5 minutes.
Purple Passion
Now personally I don't like all the little seeds in my jelly.  I'll drink them in my morning kefir smoothies for breakfast, but I like my jelly to be seedless, so we'll pour the concoction through a sieve and capture just the juice.  Use the potato masher to work the mush back and forth so that the dewberry juice drains through the sieve into a measuring cup.  What we're looking for is EXACTLY 4 1/2 cups of prepared juice.

Straining out the Seeds
While the juice continues to drain, I clean up my saucepan and add 3 cups of sugar and a box of Sure Jell Premium Fruit Pectin.

Sugar and Sure Jell
I have exactly 4 1/2 cups of dewberry juice.  12 cups of dewberries yielded exactly 4 1/2 cups of juice.

4 1/2 cups of Dewberry Juice
I add 1 cup of water to the sugar/Sure Jell mixture and bring it to a boil that can't be stirred down.

Double, Double, Toil and Trouble, Fire Burn and Cauldron Bubble
Then I pour my dewberry juice into this boiling mixture and keep 'a stirrin'...

Stirring the Pot
Bring the juice and syrup to a boil while stirring constantly.  Boil for exactly 1 minute.

Now we're ready!
Remove from the heat and using a canning funnel, ladle the hot liquid into your sterilized jars, leaving a little head space at the top of the jars for expansion.

Filling the Jars
12 cups of berries make 4 1/2 cups of juice.  That juice when added to the sugar and Sure Jell will yield exactly 8 half pints of jelly.

Ready to put the lids on and process
Okay, so now I carefully use a rag to wipe off the rims of the jars.  I say carefully because the jars are doggone hot!  Then I put the rubber gaskets on the Tattler lids and put them on jars followed by the bands. This is the tricky part with Tattler lids. You are supposed to tighten the rings down snug and then back off slightly on the bands.

Affixing the lids/gaskets
Put all the jars into the the canner with a wire rack at the bottom so that the glass doesn't touch the bottom of the pot.  Make sure that your jars are covered with 1 to 2 inches of water.  Cover and bring the water to a gentle boil and once the water is boiling, allow them to process for 5 minutes.

Into the water bath canner
Now it is time to remove your jars after they've been in boiling water for 5 minutes. Use your canning tongs.

Out of hot water
Place them on a rack to cool.  Remember to get a couple of hot pads or dish rags and tighten the bands down really tight.  Don't disturb the jars of jelly for 24 hours.  Just let them cool and rest.

Letting the jelly cool
Once 24 hours has passed you can test.  The lids should be sucked down and sealed. If sealed properly, you can use your fingers to lift each jar just by the lid and they should hold.  If not, put the ones that didn't seal in the fridge.  Fortunately, all 8 half pints sealed. and I labeled them.

Signed, Sealed, Delivered!
I'll make one more batch to stock up the pantry.  It is hard to beat homemade seedless Dewberry Jelly!

Wednesday, February 27, 2013

Making Homemade Dewberry Jelly

Being that we're knocking on the door to the month of March, I figured I'd meander over to the ditch in front of the house and see how the blackberry bushes survived the plow.  They are actually dewberries, a close relative of blackberries that grow alongside the ditch.  The landowner, after a number of years of not plowing, paid a farmer to plow the field this past fall and I was worried that the wild blackberries (actually dewberries) were toast.  But alas...

Blooming, healthy dewberries
See those little white blooms I focused in on?  Yep, those'll be beautiful berries, waiting to be picked and put in a bucket before long.  
Dewberry blooms
Armed with buckets and a penchant for getting stickers stuck in our fingers, we crossed the road last Spring and picked four one gallon size freezer bags full of dewberries.  We wash them and put them in individual layers in the freezer and then put them in freezer bags.  This way you can pour out the exact amount you need to make jelly, pie, muffins or cobbler.  We've eaten a bunch, but with the Spring blackberry harvest approaching quickly, we need to clear out the inventory in the freezer and make some jelly!  Here goes.  Pour 5 pints of whole berries in a container:  I took these out of the freezer.
Berry Good!
   
Measured out
While I'm taking care of processing the berries, I put the half pint jelly jars, along with the lids and rubber gaskets in the canner to sterilize.  I'm actually using a new type of lid, called Tattler lids.  They are reusable so I won't have to ever buy store bought lids again!

Sterilizing jars, lids, and gaskets
I put the 5 pints of berries in a pot on the stove and grab a potato masher and commence to mashing up the berries.  This is good exercise and an excellent stress reliever.
 
Use some 'elbow grease' to mash them up
Pretty soon this is what it looks like:

Dewberry puree
Now this is an optional step that we do.  Dewberries have a million little seeds that we don't really like, so we pour the mashed up concoction into a fine sieve to strain out the seeds.     
Straining out the seeds
By using a spoon to stir and force through the sieve, you'll end up with 3 3/4 cups of prepared Dewberry juice in a measuring cup.

Seedless Dewberry juice ready for jelly-making
Go ahead and pour the juice into a dutch oven and add 4 1/2 cups sugar and stir while heating.   
Adding the sugar
To the juice and sugar mixture, Benjamin adds one box of Sure Jell Fruit Pectin:

Adding Sure Jell
 While stirring continuously, bring this to a full boil on high heat so that it continues to boil even as you stir it.   
Full rolling boil
Remove from heat and then quickly ladle this into the sterilized half pint jars using a canning funnel.  Fill to within 1/8 inch of the top of the jars.  This is very hot and sticky so be careful.  Not to worry though, any spills offer an opportunity to test the flavor of the jelly.

Ladling the sweet elixir into the jars
Then I'll take the sterilized Tattler lids and put the rubber gaskets on the rims.  
Affixing the gasket on the Tattler lid
If you've gotten any jelly on the rim of the jar, wipe clean with a rag and put the lid on each jar.


Screw the rings on the lids tightly and put in your canner on an elevated rack for processing, ensuring that the water covers the top of the jars by 1 or 2 inches.

Processing the jelly
Cover and bring your water to a gentle boil, allowing the jelly to process for 5 minutes before removing them from the water bath with your canning tongs.     
Removing the processed jelly after 5 minutes
This is our compost bucket that we keep under our sink for coffee grounds and fruit and vegetable peelings.  To this, we'll add the dewberry seeds and incorporate into the garden soil.  We constantly amend our garden soil with as much organic matter as we can get our hands on.

Dewberry seed compost
Back to the work at hand, remove all the jars of processed jelly from the water bath canner and allow them to cool and sit undisturbed for 24 hours.
 
Ready for a spoon and a homemade piping-hot buttermilk biscuit!
I made two batches of homemade dewberry jelly which yielded 12 half pints (10 1/2 pint and 1 pint) of dewberry jelly.  These will be labeled and go into our pantry to be used over the next year.

Interesting (to me) facts about blackberries (or dewberries) from: http://www.pickyourown.org/blackberryjelly.php - an excellent source for 'berrying' information.
  • Blackberry tea was thought to be a cure for dysentery during the Civil War.  During outbreaks, temporary truces were declared so that both Confederate and Union soldiers could forage for blackberries to ward off the disease.  Who knew?
  • Berries contain antioxidants to ward off cancer causing free radicals. 
  • Blackberries were enjoyed by the ancient Greeks, who believed them to be a cure for diseases of the mouth and throat as well as gout.
  • The blackberry leaf was also used as an early hair dye, having been recommended by Culpeper, the English herbalist, to be boiled in a lye solution in order to "maketh the hair black."  (Not gonna try this one.)
Related Posts Plugin for WordPress, Blogger...