The pepper plants are producing pretty prolifically. Here is a picture of a nice jalapeno just begging to be picked. You can see one of the many blooms to ensure more are on the way.
We cut them up and cook with them to add flavoring to meals. We snack on them raw. We also stuff them with cheese and roll them in breakfast sausage and grill them (atomic alligator eggs). Tonight I'll show you how we slice and pickle them. The recipe is simple and we like the results.
So first I harvested a nice mixture of peppers shown below: Chocolate bells, banana peppers, cajun mini bells, poblano, criolla sella, jalapeno and two unknown varieties)
 |
| Peter Piper Picked a Peck of Pickled Peppers... |
Then I gather my ingredients. They include:
- Sliced jalapenos (you'll see why I don't tell you the quantity of peppers a little later)
- 1 cup apple cider vinegar
- 1 cup water
- 1 tablespoon peppercorns
- 3 cloves garlic, crushed a bit to release the flavor
- 2 tablespoons coarse sea salt
- 1 tablespoon sugar
First, slice up your jalapenos. You may want to wear gloves. I like to add different kinds of peppers for visual effect:
 |
| All sliced up and ready to pack in jars |
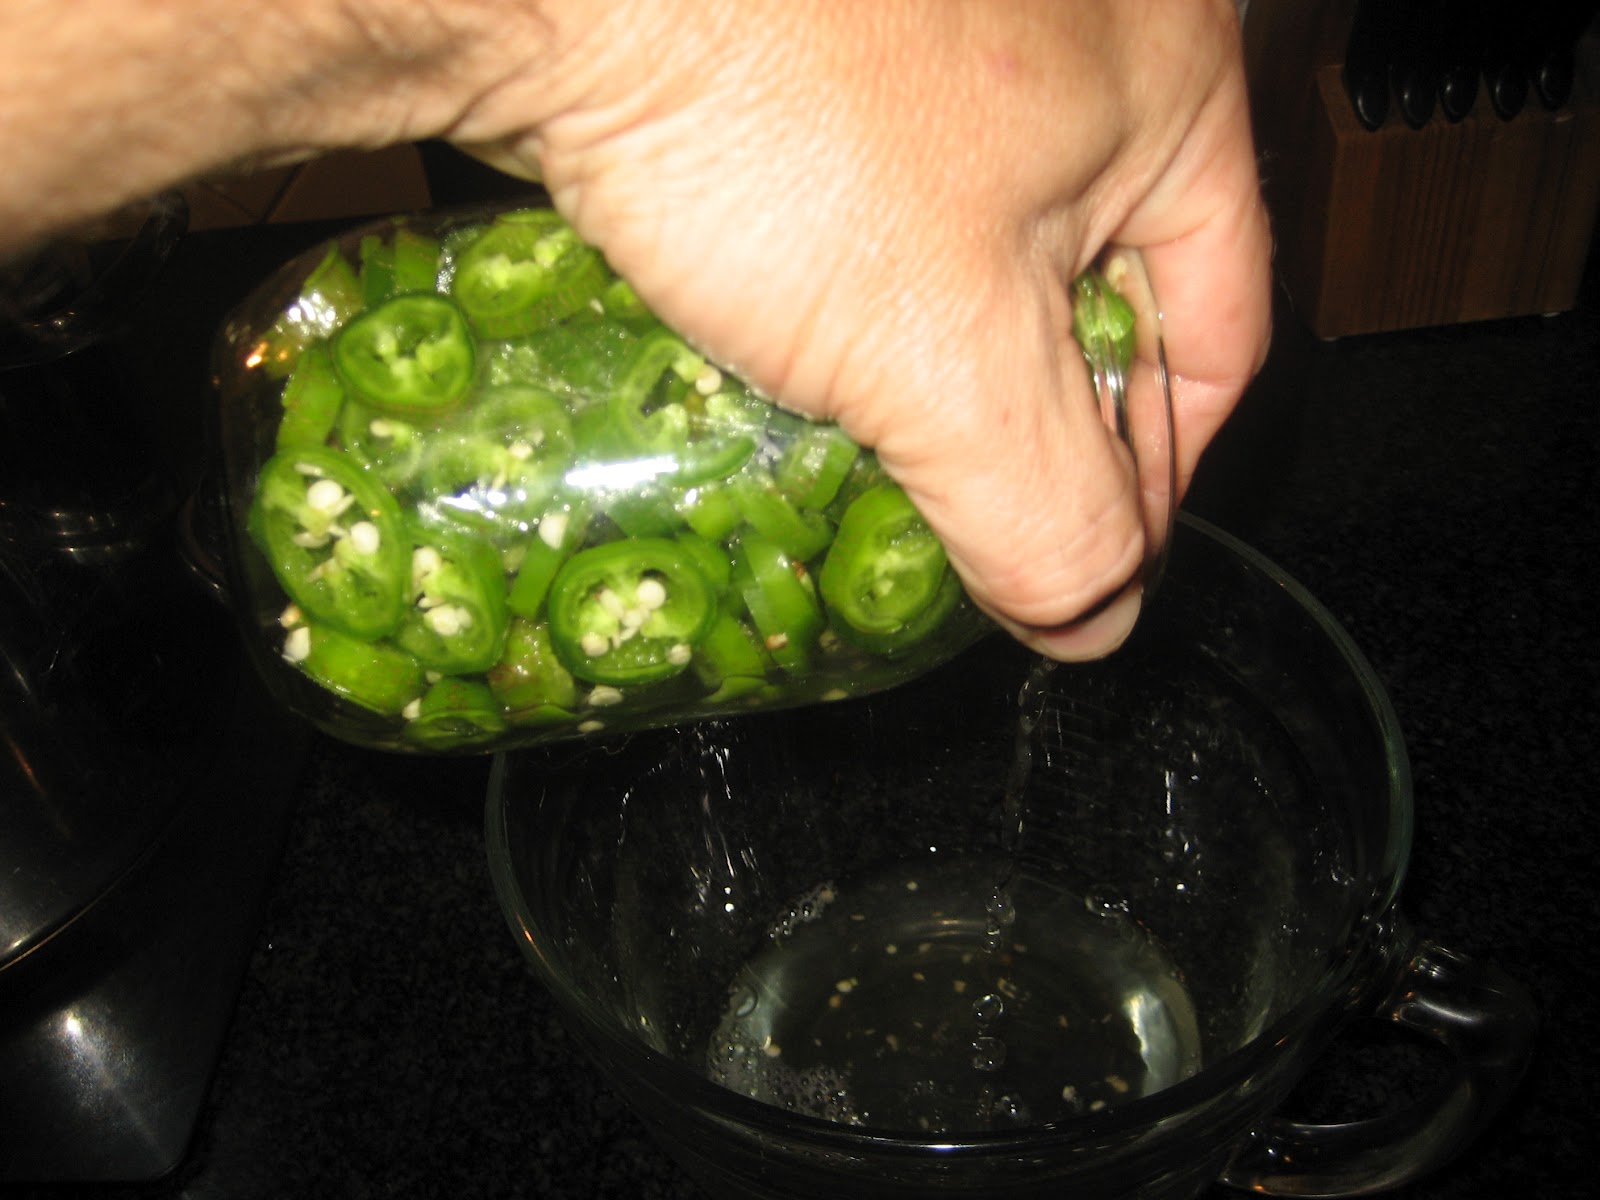
Pack in jars very tightly. Just cram them in. Then, here's a neat trick to determine your proportions: Fill the jars full of water. Once they are all full (however many jars you get filled), pour out all the water into a measuring cup.
 |
| You may use a strainer to keep the peppers in the jar. I just use my hands. |
Once you have the measuring cup full, pour out half the liquid and replace to the same level with apple cider vinegar. This ensures you have the right amount of pickling liquid to perfectly fill the jars. Adjust your proportions for the rest of the ingredients proportionally to meet your quantity of peppers.
 |
| I pour out half of the amount of liquid |
 |
| And fill back to the same level with apple cider vinegar |
Add the rest of your ingredients proportioned according to your pickling liquid:
 |
| Peppercorns |
 |
| Some smashed up garlic |
 |
| Salt and Sugar |
Mix all that together with your liquid and simmer for around 5 minutes. Then you can pour the simmered pickling juice into the jars. I use a canning funnel below, but still managed to make a big mess in the kitchen:
 |
| Note to self: use pot with a pour spout next time to save clean up time. |
I'll evenly distribute the garlic pieces and peppercorns into the jars and as you see in the photo below I add a criolla sella pepper to the top for additional color.
 |
| Five jars ready for lids and rings |
 |
| Take a big sniff. Can't you just smell the deliciousness? |
Put the sterilized lids and rings on the jars, shake them up real good and put them in a water bath of boiling water for 10 to 15 minutes
 |
| Here we go. Almost done. |
Pull them out and let them cool on a cooling rack. You'll hear the lids pop and you know that they are safely sealed and ready to be enjoyed. I have no idea of the shelf life as an opened jar doesn't last very long in our house.
 |
| Bring on the nachos, baby! |
Okay, I wasn't going to disclose this, but Tricia said I should. Some of you may have noticed that while I put 5 jars into the boiling water, there are only 4 are cooling on the racks. Where, pray tell, is the other jar? Well... I experienced some collateral damage. In my exuberance to pickle peppers, I overlooked an important step in the process. You see that circular rack in the photo above? Yeah. That bad boy is supposed to go on the bottom of the pot before you put the jars in the boiling water to keep the jars off the bottom of the pot. Never put your jars directly on the bottom of the pot or you'll break a jar like I did and have nice, sliced, pickled peppers floating around in your water and have to throw away a jar of them like I did. Oh well, I did salvage 4 jars. Bon Appetit!


No comments:
Post a Comment