Sunday, October 19, 2014

Planting Winter Ryegrass in the Pasture

The first cool weather of October is always a signal for me to get rye grass planted for the cows.  Now, we haven't been successful in getting a decent stand of ryegrass since I began seeding one third of our pasture with ryegrass seed, but I'm not a quitter and I'll keep trying until we have success.  In the past, I've cut the grass real short, seed the acre paddock, drag a post across the planted area to make the seeds get down to the ground and wait for germination.

Trouble is, I've always had a sparse stand.  I wanted to learn what others were doing, so I asked around and got another method.  This method involves the same steps, but in a different order, so I'm going to try it.  I'll seed the acre paddock first, then I'll mow the grass.  This will allow the grass cuttings to cover the seed and after a rain, the seed will work its way down to the ground and will pop up through the grass cuttings.  The cuttings will protect the seed, somewhat from predation from birds and our chickens.

Before we got started, though, I thought it would be a good idea to incorporate a quick, easy Home School lesson for Benjamin to show him how math has some very practical uses.  We needed to measure out an acre in our pasture.  I had Benjamin research to find the number of square feet in an acre.  When he determined that there were 43,560 square feet in an acre, we showed how the equation 'x' times 'y' = 43,560. We needed to eliminate one of the variables so he measured from post to post along the road and determined that it was 224 feet wide.  Now he needed to determined how far deep we needed to walk back to set our temporary fence to enclose one acre.  All he needed to do at this point was divide 43,560 by 224 to determine that he needed to mark off 194.5 feet back for the fence to create a one acre rye grass paddock.  Not only did we learn the answer to our question, but we reinforced the fact that math has practical uses in everyday life.

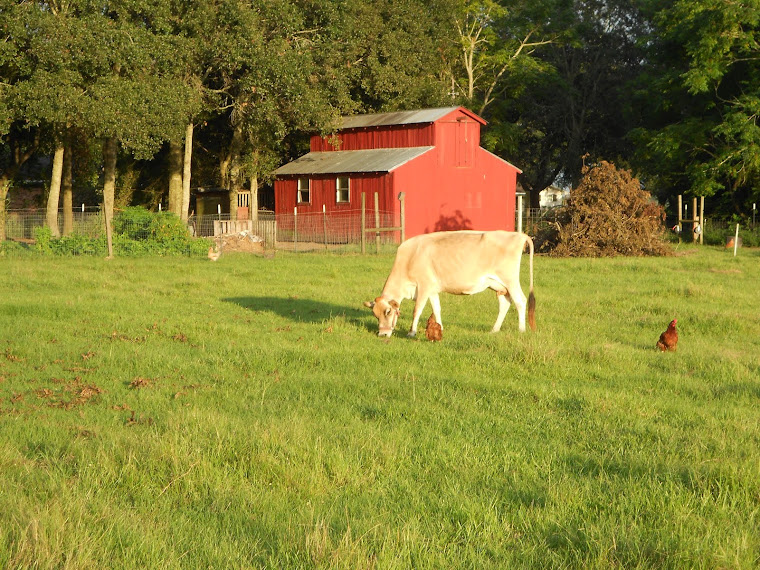
Here is the one acre paddock measured out of our little pasture:

Where the rye grass will (hopefully) grow
I purchased a 50 pound bag of ryegrass at the hardware store and pulled out my little spreader.  Yes, there are easier ways to plant rye grass, but I like a little exercise after sitting in an office all day!  I simply filled the little hopper with ryegrass seed, put the setting on the appropriate setting, and we're ready to start planting.

The seeder and the seed
Ryegrass seed is very small and very light.

Ryegrass Seed
The seed falls through the opening at the bottom of the hopper and falls on a spinning plate at the bottom of the spreader that broadcasts the seeds evenly across the pasture.  I walked back and forth in straight swaths.  I could see where my previous path was due to the marks in the grass left by the wheels.  The best time to do this is in the morning while the dew is on the ground so that your wheels leave marks in the wet grass.  I planted in the evening but was still able to see the marks in the grass to gauge where my next swath would be.

According to something I read ryegrass seed will take between 5 and 10 days to germinate.  It has been dry around here so I would assume it will take a little longer. Hopefully we'll have success this year with ryegrass.  I will always have our Plan B in the event we are unsuccessful and will have plenty of hay for the girls to fall back on.  We'll keep you posted on the ryegrass progress and whether or not we get a successful stand.

Friday, October 17, 2014

Mulligan Stew

A week ago I got a phone call from my neighbor.  Our neighbors are great.  We love them.  It is such a blessing to have good neighbors.  They allow us to pick figs, satsumas, grapes, muscadines and lemons off their trees and we'll give them milk and eggs.  We also assist one another with yard work or limb pick-up after storms. They are great cooks and we'll often get a knock at the door and will be greeted with a warm loaf of Amish bread or a plate lunch of fresh fried catfish, lima beans and coleslaw.

So it was nothing out of the ordinary when they called and asked if we had any plans for the Saints game.  I said no and they invited us to come over to their outdoor kitchen to help them eat Mulligan Stew and watch the Saints play.  Tricia made some homemade cookies and we eased over Sunday after we got back from church.

Now, I had no clue what mulligan stew was.  It sounded Irish, so I assumed that it had potatoes in it. I was right - partially.  When we opened the screen door, my neighbor asked if we had ever eaten mulligan stew and we said, "No."  He sort of smiled.  He was browning a huge pile of meat in a pot on the stove.  It smelled great!  He said that every Fall before hunting season, it was customary in their house to make Mulligan Stew.

Mulligan Stew is something that his Daddy started as a tradition, of sorts, to clean out the freezer to make room for the wild game that was about to be killed during this hunting season.  All different types of meat would be thrown in the pot, browned with onions and garlic and then have stock and chopped mixed vegetables and pasta shells thrown in and stewed down.  When done it would be served over rice.  I searched for a picture and it best looks like this one I found on a Google search:

Image Credit
According to Wikipedia, Mulligan stew was served in hobo camps in the early 1900's and was made with whatever could be "begged, scavenged, found, or stolen." So the aroma filled the outdoor kitchen in the shop and at around 2 pm, it was time to eat.  We lined up, got our bowls, filled them with rice, ladled a heaping portion of mulligan stew over our rice and went and sat down.

When we sat down, our neighbor's wife and her sister, smiled and said, "Y'all eat that?  We're not big on eating squirrel heads.  We're gonna eat something else."  I looked down in my bowl and saw something that looked very similar to this staring back up at me:

Image Credit
They would take the handle-end of a butter knife and crack the little skull and then pull out the brains and eat them.  Now, I'm fine eating squirrel.  And I enjoyed the taste of Mulligan Stew.  I just can't bring myself to eat the head or squirrel brains!  I politely ate around the head until it was the only thing left in my bowl.  I think I heard my neighbor's son say, "Aw man, you left the best part!"

Benjamin and I will be doing some squirrel hunting in our yard to thin out the squirrels so they don't get all our pecans.  We will skin and clean the ones we kill, but the heads won't make it into our bowls.  They'll be buried in the garden along with the skin, guts and tail.

Thursday, October 16, 2014

Growing Comfrey

We had been hearing about the numerous helpful properties of comfrey and wanted to plant some in our garden.  As if reading our minds, a friend of ours gave Tricia some comfrey they had in their garden.  It was dug up by the roots and wrapped in a paper towel and my wife brought it home.  By the time I got home in the afternoon, the plant had wilted and looked terrible.  I promptly took it out to the garden, planted it, and watered it, hoping to revive it so that it would grow, but after a few days, I noted the time of death and sadly mourned the passing of our comfrey plant. I remember going inside and asking the Queen of Our Maker's Acres Family Farm to make sure to water bare root plants in the future so that they don't die - like our ill-fated comfrey.

Imagine my surprise (and shame) when a month later I saw green growth coming up out of the ground in the location by the compost pile where I had planted the comfrey!  It's ALIVE!! The comfrey grew back from the roots and it has flourished. Here's a picture of the plant:

Comfrey flourishing by the compost pile
Now to the things that comfrey can be used for.  First, comfrey contains a chemical compound called allantoin.  Allantoin moisturizes and promotes in cell growth.  It is a healing aid to help with swelling or inflammation, soreness or in relief of rashes or blistering of the skin.

A poultice can be made by boiling the fleshy, leathery leaves in water and then wringing out the leaves and then putting the warm, softened leaves into a cloth and applying it to the injured part. We've not done this yet, so I cannot give a review of the results, but we intend to and I'll let you know our thoughts.

Healing Leaves
In the articles that I read on comfrey like this article HERE, I learned that comfrey is a liver toxin and as a result, it isn't to be taken orally, applied to broken skin, or fed to livestock - so there's that note of caution!  Comfrey has been used throughout the ages for its healing properties and I was surprised to learn that it was once called, knitbone, or boneset, for its ability to help mend bone fractures.

Image Credit
Another one of the good aspects of comfrey is that it is known as a 'miner.'  It sends out a root system that can go down 10 feet.  This brings up nutrients that might not otherwise be accessed by other plants in the garden and allows those nutrients to be used.  Additionally, comfrey, when mixed in the compost pile, is said to aid in the decomposition of the pile, similar to what manure does.  Some people use it as a soil conditioner or fertilizer and lay the leaves in the ground when planting potatoes.   

Healthy comfrey
Comfrey can be harvested by simply cutting it all down to about two inches above the soil level and it will grow back in a month, allowing you to harvest again.  The leaves can be dried and stored so that you can use them later.  We're new to growing comfrey, so stay tuned and we'll report back our experience using it.

Wednesday, October 15, 2014

The Okra is still producing

Okra is one of those crops that is hardy.  It will produce in sunshine, storm, rain, or drought and will continue producing until the frost kills it.  We've found that we only need a small row because it produces so much that 10 - 12 plants give us all we can eat and more.  In fact we have to harvest every single day.  We normally eat okra prepared as a side dish, stewed with tomato and onions with some lemon juice added to cut down on the 'slime factor.' We also have enjoyed a curried okra dish: Click Here for recipe

We also love to pickle okra.  Those things are addictive.  If you open one jar of them, you cannot resist until they are all gone.  I'll have to do a post on how we pickle them.  They are delicious!  We add cut okra to gumbo, we will also drizzle whole okra with olive oil and add sea salt and cracked black pepper and grill them on skewers - yum!  Often when I'm picking them in the garden, I'll grab some small ones and just eat them raw.  They are crisp and tasty.

One thing that we haven't tried yet, but I want to, is eating the okra flower.  Up to this point, we just let the flower go on and make okra.  But I learned that okra is a member of the hibiscus family and the flowers are edible.  People add the flowers to salads or the thing we want to try is this: You can stuff the okra flower with herbs, batter and deep fry.  Now that sounds interesting!

Edible Okra Flower (Who Knew?)
Yesterday afternoon late I walked to the garden to harvest the daily okra bounty. Usually I won't even bring a bucket - I'll just pick ripe ones off the stalk with one hand and fill up my up-turned shirt with the pods.  At this point in the season the okra stalks are tall and one must bend them over to harvest the pods.  You have to look closely as the okra sends up shoots off the side that bloom and make okra. Since the okra grows tall, they are susceptible to blowing over in the thunderstorms we get.  I have to use a shovel to pile dirt around the base of the plant to hold them up sometimes.

The row of okra
Here is a ripe one shown below.  Ideally, I try to pick them when they are less than five inches in length as I find that when allowed to grow longer, they get "woody" and are inedible.  No worries, though, if that happens.  We'll let them dry on the stalk and then harvest them at the end of the growing season for seed.

The only things you have to watch out for when harvesting is that it is best to pick them while wearing a long sleeved shirt.  Okra can make you itch!  Also, fire ants seem to like the sweet baby okra and they'll climb up from the base of the plant all the way out to the young pods.  Many days I've been stung by fire ants that have hitch-hiked on the pod and into my shirt.  Not a pleasant experience.

Ready for picking
Each day we'll get a colander like this:

Washing up the okra
We'll wash them and eat them.  I forgot to mention that okra freezes well.  We blanch and freeze them for use in gumbos.  I did a post about how we do that earlier and you can see how we do it by clicking HERE.

Okra Shining Brightly
Okra will always be allotted a row in our garden, if not for its many uses in our kitchen, for its ease in growing and resistance to adverse weather, crop failure, and most pests (besides fire ants).

Tuesday, October 14, 2014

The Arena

I'm posting one of my favorite quotes below - one that I used to have printed out and taped to my computer monitor so that I could see it each and every day:

“It's not the critic who counts. It's not the man who points out how the strong man stumbled. Credit belongs to the man who really was in the arena, his face marred by dust, sweat, and blood, who strives valiantly, who errs to come short and short again, because there is no effort without error and shortcoming. It is the man who actually strives to do the deeds, who knows the great enthusiasm and knows the great devotion, who spends himself on a worthy cause, who at best, knows in the end the triumph of great achievement. And, who at worst, if he fails, at least fails while daring greatly, so that his place shall never be with those cold and cruel souls who know neither victory nor defeat.”

― Theodore Roosevelt
Image Credit
Wow!  What a powerful, powerful quote!!!

The world abounds with critics - people who sit back and criticize everything. You've done it and I have too.  Take, for example, the "Monday Morning Quarterbacks" who dissect their team's performance from the game on the previous Saturday or Sunday (guilty as charged!).  Although we may have played football in the past, many of us are not in physical condition to play the game, or do not possess the physical or mental gifts to play the game, or cannot comprehend the incredible work and time commitment goes into playing the game.  And yet we criticize, sometimes making personal attacks.

It is easy to criticize.  It doesn't take any practice, or work, or risk.  That is not to say that all criticism is not justified, quite the contrary.  I think it is the spirit of the criticism that is noteworthy.  If it is constructive criticism meant to offer suggestions to better the person and build them up, then it is crucial, but we should ensure that our motives are right and our delivery is kind and thoughtful.  If the criticism is just meant to tear someone down, we should keep it to ourselves.

Image Credit
But the main point of President Roosevelt's quote is not addressing the critic, but the participant - the warrior, the person who has risked it all, the person in the arena that is trying valiantly.  I like the way he says that this person may come up short again and again.  In fact, this person may NEVER succeed, BUT at least he tried, he risked, he dared...

Sometimes we plant crops and they don't grow or they are decimated by weather, pests, or disease. Sometimes we raise kids and they make decisions or do things that we wish they wouldn't have done. Sometimes we devote ourselves to some worthy cause, dream, purpose or goal - and we fail.  And we see people who picked up on that same dream and they run with it and succeed.  Why?  Why does this happen? I don't know.

There are some great life lessons in that quote - lessons that encourage you to get out of bed each morning and keep trying, keep dreaming, and keep reaching for your goals.  Get off the couch and get into the arena!

Image Credit
“It is better to try and to fail than to fail to try and forever experience the inestimable loss of what might have been.”

― -Unknown_

Monday, October 13, 2014

Making Homemade Tabasco Pepper Sauce (Part One)

We have grown many types of peppers in our garden, including jalapenos, banana, bell peppers (purple, gold, chocolate and green), cayenne, and criolla sella.  One pepper that we've never grown before is the Tabasco Pepper.  We do use McIlhenny's Tabasco Sauce though.  I like it on red beans and rice and rice & gravy. Earlier this Spring, Tricia was picking up some feed at the Feed Store in town and the proprietor gave her a couple Tabasco Pepper plants. What a deal!  So I planted them in the garden and they have thrived!  They are both about three feet tall and absolutely covered in beautiful peppers that light up the garden.

Tabasco peppers at various stages of ripeness
The photo below shows the full color spectrum of the peppers, from green to yellow to orange to deep red.  When they are the deepest red color, it is time to harvest them.  We pick them, pulling off the stem and green cap and bring them inside.

Beautiful Tabasco peppers
These peppers are the same peppers that are indigenous to Mexico and South America and were brought to Avery Island, Louisiana by Mr. McIlhenny to make the famous Tabasco Sauce.  They make a mash of the ripened peppers, add a little salt that is mined from beneath Avery Island, add some vinegar and then allow the mash to age for 3 years in oak barrels.

I thought it would be fun to make our own Tabasco Sauce!  We picked the ripened peppers and brought them inside and cleaned them, making sure not to put our fingers anywhere around our eyes as these little boogers are hot!

Tabasco Peppers, cleaned
I chopped up the peppers on a cutting board.  You could smell the "heat" in the air.

Chopped Peppers
I added the chopped peppers to a saucepan along with a cup and a half of white vinegar and some salt and brought the mixture to a boil.

Salting the mash
Once it started to boil, I turned the heat back and let it simmer for 10 minutes.

Simmer down!
I got a potato masher and thoroughly mashed up the mixture to release all the flavor and color.  Then I pulled the saucepan off of the stove top and let it cool to room temperature.

Cooling down
We spooned the Tabasco pepper mash into the food processor and pureed it for a little while until it became a liquid.  I just love the coloration of this - such a bright red!

Red Hot!
There are many different types of pepper sauce.  My Grandmother, that we affectionately called Bumby, always called pepper sauce "Red Hot," regardless the brand.  You can tell by the photo why one might call it that!

I poured the pureed pepper mash into a tall quart sized freezer jar that we'll use to steep or age our Tabasco Sauce in instead of an oak barrel. It fit into the container just perfectly.

Jar almost filled
Instead of aging it for three years, we'll age it for 3 weeks in the fridge.  I dated the mash so that we'll know when it is ready.

Aging Pepper Sauce
Then I placed it on the top shelf of the refrigerator where it will sit and age until November 1st.

Cold Storage for a HOT Sauce
We'll show you Step 2 of our process in making Homemade Tabasco Sauce during the first week of November along with a taste test and review of the product.  This was a fun experiment and I'm looking forward to seeing how it turns out.

Saturday, October 11, 2014

The Momma Hen (Part Deux)

After a Black Star hen hatched out a little brood of four chicks, one of which died in a rainstorm, yet another Black Star hen got broody and was sitting on three more eggs.  Usually, we'll move them aside and pick up the eggs, but we decided to allow her to hatch out her eggs.  While the previous hen had a secret nest, this girl nested in a milk crate nesting box adjacent to the goat milking stand.  As you can see, sometimes Nellie, the goat, does her business and her 'pellets' fall in the nesting box. We try to keep fresh hay in the nesting boxes, but we haven't been able to put fresh hay with her sitting on eggs.

Momma Hen with feathers all fluffed up
We heard some chirping and lifted her up to reveal one baby chick that had hatched out.  The other two eggs evidently weren't fertile and never hatched.  A 33.33% hatch rate - not as good as our incubator.  We have plenty of roosters, but apparently some of the hens aren't getting fertilized.

Checking on the Chick
Oh well.  After setting for a few more days, the hen figured out that it was futile and started to tend to her only child, nurturing for her, caring for her, and teaching her. I say her, because we're hoping it is a female.  We really don't need any more roosters.

School is in session
It is really remarkable to watch a momma hen and her offspring.  She makes all sorts of noises in communicating with her chick.  You can hear the different inflection in her clucks that identify when she's trying to send an alarm or a calm cluck when she's trying to teach or draw her chick near to her.

She will use her beak to point out where bits of food, seeds, or water is.  If the chick isn't paying attention (like a lot of students do from time to time), the mother hen will call urgently, "Come eat, watch me, learn..."  It is really neat the way God has wired Mothers to have the motherly instinct, to be so compassionate and caring. The Momma hen models behavior for her chick and expects her to watch and learn - just as human mothers do.

The chick is not paying attention
The chick may be doing her own thing, but the mother calls and then the chick will come running!

Here I am!
The hen is very protective over her little chick.  If I try to come between her and her baby, she'll make threatening noises, fluff her feathers and her little one will come running and get underneath her for protection.

A teachable moment
While the other hen had 3 little ones to keep together and observe, this hen only has one.  She can direct her full attention to raising and teaching one baby.  We also check on the chick daily and I noticed today that she is starting to put on her first little feathers.  Just like human babies, they grow up too fast and leave the nest!
Related Posts Plugin for WordPress, Blogger...