A wise person once told me to NEVER seek employment that is east of where you live. The reason? You'll be commuting to work in the morning with the sun in your eyes and then commuting back home in the afternoon with the sun in your eyes. Even though I wear sunglasses and use my sun visor, it is still an annoyance for sure.
Here is my morning commute down I-10 toward Lafayette:
And here is what I see as I turn off of Highway 26 in the afternoon...
As the last photo evidences, there's not much time to do any gardening, chores with the animals or knock anything off the 'to-do' list before it gets dark. That changed today with Daylight Saving Time. Now when I get home, I can get some things done! The spring garden isn't going to plant itself!
Of course, I'll still get to enjoy some nice sunsets, but I'll get to enjoy them leaning against a shovel instead of behind the wheel in a car.
With the extra daylight this week, I'll try to:
*transplant all the tomatoes into the garden,
*move the cows through the yard to eat the remaining winter grass,
*mow/mulch the leaves and weeds in the yard & move it to the garden compost pile,
*plant some corn, beans, squash, cucumbers, etc.
Make it your ambition to lead a quiet life and attend to your own business and work with your hands, just as we commanded you. - 1 Thessalonians 4:11
Sunday, March 12, 2017
Thursday, March 9, 2017
Processing the 2016 Pecan Crop
We have a few pecan trees in the yard and each year we pick what we can from underneath the trees crack and shell them. Our pecans are really small, but they are rich - loaded with oil and very flavorful.
I like to sit in front of the fireplace while shelling pecans. It is a relaxing, yet rewarding task. Depending on how many pecans we pick, it can be a long process to get them cracked, shelled and in the freezer. We compost all the pecan shells into the garden. This year we took our pecans to our local feed store to have the pecans cracked. In the past, I'd crack them myself, but for a small investment, having them cracked mechanically, saves a lot of time. There was a problem, though. The mechanical cracker at our local feed store was broken and they weren't fixing it until next season.
We looked around and found that there is a place in nearby Breaux Bridge, Louisiana, called the Fruit Stand that has a pecan cracker that will crack our small pecans. They charge by the weight and when they weighed the pecans that we brought to them, the total was 62 pounds. They charge $0.35 per pound to crack them, so the total was $23.
Tricia dropped them off and drove to Lafayette and had lunch with me. An hour later when she went to pick them up, they were ready. She shopped around at the Fruit Stand and bought some good french bread while she was there. She also looked at what they were selling shelled pecans for. $10 a pound! Wow. She brought the big molasses tub full of 62 pounds of cracked pecans home and I got busy. Since the pecans had sat on our back patio for a few months, we experienced some loss. Some of the pecans were bad, but many were good. In no time at all I had the big tub empty. Out of 62 pounds of cracked pecans, we yielded five one gallon sized Zip Loc bags holding 18 pounds of shelled pecans. I was hoping for better, but that's okay. Now we have a baseline of 29% return on pecan "meat" to whole pecan, we'll shoot for better next year.
Although we snacked on some, we like to preserve them by soaking them and then freezing them. We use a recipe from Sally Fallon's Nourishing Traditions cookbook. It is called Crispy Pecans. We love this recipe. It is very easy. It calls for:
4 cups pecans
2 teaspoons sea salt
filtered water
Mix the three ingredients and allow it to soak overnight. In the morning, drain in a colander.
Then spread the soaked pecans on a tray and place in an oven, or in our case, a warmer, and let it get to 150 degrees for 12 to 24 hours, turning until they are dry and crispy.
When dry, we pour them back into a Zip Loc bag and snack on them or freeze them for snacking or using for baking recipes like pies and brownies pancakes.
I like to sit in front of the fireplace while shelling pecans. It is a relaxing, yet rewarding task. Depending on how many pecans we pick, it can be a long process to get them cracked, shelled and in the freezer. We compost all the pecan shells into the garden. This year we took our pecans to our local feed store to have the pecans cracked. In the past, I'd crack them myself, but for a small investment, having them cracked mechanically, saves a lot of time. There was a problem, though. The mechanical cracker at our local feed store was broken and they weren't fixing it until next season.
We looked around and found that there is a place in nearby Breaux Bridge, Louisiana, called the Fruit Stand that has a pecan cracker that will crack our small pecans. They charge by the weight and when they weighed the pecans that we brought to them, the total was 62 pounds. They charge $0.35 per pound to crack them, so the total was $23.
Tricia dropped them off and drove to Lafayette and had lunch with me. An hour later when she went to pick them up, they were ready. She shopped around at the Fruit Stand and bought some good french bread while she was there. She also looked at what they were selling shelled pecans for. $10 a pound! Wow. She brought the big molasses tub full of 62 pounds of cracked pecans home and I got busy. Since the pecans had sat on our back patio for a few months, we experienced some loss. Some of the pecans were bad, but many were good. In no time at all I had the big tub empty. Out of 62 pounds of cracked pecans, we yielded five one gallon sized Zip Loc bags holding 18 pounds of shelled pecans. I was hoping for better, but that's okay. Now we have a baseline of 29% return on pecan "meat" to whole pecan, we'll shoot for better next year.
| Four bags - with one already in the freezer |
4 cups pecans
2 teaspoons sea salt
filtered water
Mix the three ingredients and allow it to soak overnight. In the morning, drain in a colander.
Then spread the soaked pecans on a tray and place in an oven, or in our case, a warmer, and let it get to 150 degrees for 12 to 24 hours, turning until they are dry and crispy.
When dry, we pour them back into a Zip Loc bag and snack on them or freeze them for snacking or using for baking recipes like pies and brownies pancakes.
Wednesday, March 8, 2017
2017 Meat Birds - 3 Weeks Old
This evening Tricia cooked up some fried rice with a couple of fresh eggs and then stir-fried some chicken with snow peas, carrots and water chestnuts. I haven't tried to grow water chestnuts, but everything other than the rice came from the pasture or the garden. But let's REWIND things a bit.
That chicken in the recipe tonight at one time were not in the pot, but in our brooder... like these birds. They look to me like they've grown, but we will confirm that in a moment. They are filling up the brooder. They are also filling up our garage with a strong stench of chicken poop. Soon we'll move them out to the pasture.
Before I even put them up on the scale, I know they have increased in size. I rescued the bird below who had gotten greedy and his head was stuck in the feeder. Tomorrow, I will remove the lids off of the feeder. There are pros and cons to doing that. On the plus side, the birds won't get their heads stuck anymore. On the negative side, the clean feed you see in the feeders won't be so clean anymore. The lid keeps the birds from sitting in the feeder and pooping in it. They certainly don't have good table manners.
Last week I mentioned that I would find a way to mark the birds so that I would be able to quickly pick out the bird we are weighing each week, and ensure that we are weighing the same exact bird. Initially, I was thinking about just spray painting a dot on one of their heads. Then Tricia encouraged me not to as the paint might be toxic to the bird (as well as us) when we ate him.
Plan B: I found a maroon ribbon in Tricia's craft box and tied the ribbon around the bird's neck. I'll pick him out each week from here on out. As he grows, I'll have to cut the ribbon off and put a new one on so he doesn't get choked. You can see the ol' boy with his bowtie standing on top of the scale. When I picked him up, he was markedly heavy - and warm. I turned off the heat lamps as I think they are generating enough body heat to keep each other from being cold.
Let's take a look at the scale...
So to summarize, last week they weighed on average 13 ounces and this week 1 pound 9 ounces. That means they gained 12 ounces over the last week. They are still 6 ounces shy of where they were at this age last year, but 11 ounces heavier than what the 2015 birds weighed at this age. Next week they'll likely be out of the garage (Yes!) and out on grass in the pasture.
That chicken in the recipe tonight at one time were not in the pot, but in our brooder... like these birds. They look to me like they've grown, but we will confirm that in a moment. They are filling up the brooder. They are also filling up our garage with a strong stench of chicken poop. Soon we'll move them out to the pasture.
Before I even put them up on the scale, I know they have increased in size. I rescued the bird below who had gotten greedy and his head was stuck in the feeder. Tomorrow, I will remove the lids off of the feeder. There are pros and cons to doing that. On the plus side, the birds won't get their heads stuck anymore. On the negative side, the clean feed you see in the feeders won't be so clean anymore. The lid keeps the birds from sitting in the feeder and pooping in it. They certainly don't have good table manners.
Last week I mentioned that I would find a way to mark the birds so that I would be able to quickly pick out the bird we are weighing each week, and ensure that we are weighing the same exact bird. Initially, I was thinking about just spray painting a dot on one of their heads. Then Tricia encouraged me not to as the paint might be toxic to the bird (as well as us) when we ate him.
Plan B: I found a maroon ribbon in Tricia's craft box and tied the ribbon around the bird's neck. I'll pick him out each week from here on out. As he grows, I'll have to cut the ribbon off and put a new one on so he doesn't get choked. You can see the ol' boy with his bowtie standing on top of the scale. When I picked him up, he was markedly heavy - and warm. I turned off the heat lamps as I think they are generating enough body heat to keep each other from being cold.
Let's take a look at the scale...
Here are the results from Week 3 :
*Week 3 2017: 1 pound 9 ounces
*Week 3 2016: 1 pound 15 ounces
*Week 3 2015: 14 ounces
*Week 3 2017: 1 pound 9 ounces
*Week 3 2016: 1 pound 15 ounces
*Week 3 2015: 14 ounces
So to summarize, last week they weighed on average 13 ounces and this week 1 pound 9 ounces. That means they gained 12 ounces over the last week. They are still 6 ounces shy of where they were at this age last year, but 11 ounces heavier than what the 2015 birds weighed at this age. Next week they'll likely be out of the garage (Yes!) and out on grass in the pasture.
Tuesday, March 7, 2017
Hardening Off the Tomatoes and Peppers
The last time I posted about our seedlings, I had thinned them out by separating and re-potting those that had more than one seedling growing in a seed pot. I carefully labeled each container and was able to separate the intertwined roots without losing a single plant. The only problem, if you want to call it a problem, is that I now have more pepper plants than I can eat. It didn't take much searching to find several people who will give the extra pepper plants good homes!
So after I thinned them out, I put them out on the back patio in order to 'harden them off.' Hardening them off involves gradually introducing them to cooler outdoors weather and wind. The operative word there is gradually. If you do it too fast, you risk shocking your tender plants. I have a cold frame that I put hinges on and built out of some windows out of an old home. Someone was throwing them away and had them stacked by the road. Now they have been re-purposed.
In the first nights, I had a heat lamp shining hot, bright light inside the cold frame, keeping the plants inside warm. There is a window on the top of the cold frame and while not airtight, it keeps out the wind and retains the warm air inside.
After a few days, I removed the heat lamp and replaced it with the fluorescent grow light that I had over the plants when they were inside the house. This slowly acclimates them to the variation in temperature and prepares them for the days to come.
In lifting the top off of the cold frame, you can peer down and see some of the peppers and the tomatoes and eggplant. I had already removed a flat of peppers to plant that I'll show you in a minute. If something looks a little strange with the tomatoes, I'll show you why. Gardening is a trial and error thing. Once the plants get their second set of leaves, I'll spray fish emulsion on the leaves as a foliar feeding. When plants are young, the label calls for putting a diluted amount of fish emulsion in the sprayer. That would be 50% of the normal amount of 1 Tablespoon per gallon of water. So I mixed up my little gallon sprayer with water and 1/2 tablespoon of fish emulsion.
It caused the peppers to turn a bright blue green color and literally jump up out of the soil. It was by far the best looking pepper seedlings I've ever started. The tomatoes, by contrast, were hurt by the fish emulsion, even though it was mixed at the same concentration. The tender leaves on the top were burned by the fish emulsion and turned the leaves a yellowish-white color. It reminded me of damage that the rice herbicide, Command, causes plants to be unable to carry out photosynthesis and thus, they die. Fortunately for the tomatoes, they recovered from the fish emulsion damage and put out new green growth. I have made a note for next year that while peppers thrive with a 1/2 Tablespoon to 1 Gallon water mixture, tomatoes cannot handle this. I'll experiment with a 1/4 Tablespoon mixture next year.
These are the peppers that I put out in the garden this past Saturday.
If all goes as planned, I'll move the tomato seedlings out to the garden this weekend. Once those are in the ground, I'll start working on planting corn, beans, squash, cucumbers and a myriad of other delicious vegetables we like to plant.
So after I thinned them out, I put them out on the back patio in order to 'harden them off.' Hardening them off involves gradually introducing them to cooler outdoors weather and wind. The operative word there is gradually. If you do it too fast, you risk shocking your tender plants. I have a cold frame that I put hinges on and built out of some windows out of an old home. Someone was throwing them away and had them stacked by the road. Now they have been re-purposed.
In the first nights, I had a heat lamp shining hot, bright light inside the cold frame, keeping the plants inside warm. There is a window on the top of the cold frame and while not airtight, it keeps out the wind and retains the warm air inside.
After a few days, I removed the heat lamp and replaced it with the fluorescent grow light that I had over the plants when they were inside the house. This slowly acclimates them to the variation in temperature and prepares them for the days to come.
In lifting the top off of the cold frame, you can peer down and see some of the peppers and the tomatoes and eggplant. I had already removed a flat of peppers to plant that I'll show you in a minute. If something looks a little strange with the tomatoes, I'll show you why. Gardening is a trial and error thing. Once the plants get their second set of leaves, I'll spray fish emulsion on the leaves as a foliar feeding. When plants are young, the label calls for putting a diluted amount of fish emulsion in the sprayer. That would be 50% of the normal amount of 1 Tablespoon per gallon of water. So I mixed up my little gallon sprayer with water and 1/2 tablespoon of fish emulsion.
It caused the peppers to turn a bright blue green color and literally jump up out of the soil. It was by far the best looking pepper seedlings I've ever started. The tomatoes, by contrast, were hurt by the fish emulsion, even though it was mixed at the same concentration. The tender leaves on the top were burned by the fish emulsion and turned the leaves a yellowish-white color. It reminded me of damage that the rice herbicide, Command, causes plants to be unable to carry out photosynthesis and thus, they die. Fortunately for the tomatoes, they recovered from the fish emulsion damage and put out new green growth. I have made a note for next year that while peppers thrive with a 1/2 Tablespoon to 1 Gallon water mixture, tomatoes cannot handle this. I'll experiment with a 1/4 Tablespoon mixture next year.
These are the peppers that I put out in the garden this past Saturday.
If all goes as planned, I'll move the tomato seedlings out to the garden this weekend. Once those are in the ground, I'll start working on planting corn, beans, squash, cucumbers and a myriad of other delicious vegetables we like to plant.
Monday, March 6, 2017
The First Lawn Mowing of 2017
On March 4th it warmed up to 80 degrees. Like clockwork I heard the neighbors, one by one, cranking up their lawnmowers and then weedeaters to get their lawns looking nice. It takes a little work to get the winter grass and clover cut back. Not to mention the leaves. The live oaks are dropping the old growth leaves while putting on new leaves and tassels.
Pulling the lawnmowers out of the garage after the winter hibernation takes a little work. Of course the tires must be aired up to the proper pressure level. The changing temperatures always affects the air level in the tires. I read that for every 10 degree Fahrenheit change in air temperature outside the tire, results in a 2% change in air pressure inside the tire, either up or down, depending on air temperature increase or decrease.
I'll clean the battery posts and connections with a wire brush after I loosen the connections to scrape away the corrosion. I'll jump start 'Ol Betsy and run some Sea Foam fuel treatment through her until she purrs like a kitten. Then she's ready to go. But I'm getting ahead of myself.
First I "pre-mow." I'm not going to just chop down all that white dutch clover growing in the yard without letting Daisy and Rosie eat it. But first that takes some preparation by stringing up our solar charged portable electric fence. During the off-season when the grass doesn't grow, I take down the cross-fencing paddocks in the pasture that I rotate the cows through. Toward the end of the season I noticed that our old solar charger wasn't 'hot' enough. The cows were going right through it without being shocked.
When I pulled it down, I had it shipped off to the manufacturer to see what the issue might be. I learned, to my dismay, that it was more economical to buy a new solar fence charger than pay for the repairs needed to refurbish it. The old fence charger had done its job over the years, but finally petered out. I purchased a new one for a little over $154. I sat it out in the yard and let it charge up for a while and then I strung the portable fence up, hammered in a ground rod, hooked up the wires, and went and got the cows.
Funny thing is, like Pavlov's salivating dogs, the sound of me unrolling the poly-wire rope on the reel, captured the cow's attention. They remember that sound equates to fresh grass and they start lining up at the fence and mooing loudly. One at a time I walked over, opened the gate and got the matriarch of our little herd, Daisy...
Followed closely by Rosie. Poor Clarabelle, Luna, and Chuck have to stay in the pasture. Daisy and Rosie are still in milk and we give them the best grass so that they'll produce the best milk for us. If you notice both above and below, they both made a beeline for their favorite item on the salad bar - white dutch clover. I left them in the side yard for about three hours and they manicured it nicely. Meanwhile, if you look below to the right of the live oak, you can see the John Deere lawn tractor warming up, ready for duty.
With the "pre-mowing" done, I put the cows back in the pasture, roll the poly-rope back on the reel, pull up the temporary step-in posts and get on the John Deere lawn tractor. Nothing runs like a Deere - or our Jersey cows to white dutch clover.
Pulling the lawnmowers out of the garage after the winter hibernation takes a little work. Of course the tires must be aired up to the proper pressure level. The changing temperatures always affects the air level in the tires. I read that for every 10 degree Fahrenheit change in air temperature outside the tire, results in a 2% change in air pressure inside the tire, either up or down, depending on air temperature increase or decrease.
I'll clean the battery posts and connections with a wire brush after I loosen the connections to scrape away the corrosion. I'll jump start 'Ol Betsy and run some Sea Foam fuel treatment through her until she purrs like a kitten. Then she's ready to go. But I'm getting ahead of myself.
First I "pre-mow." I'm not going to just chop down all that white dutch clover growing in the yard without letting Daisy and Rosie eat it. But first that takes some preparation by stringing up our solar charged portable electric fence. During the off-season when the grass doesn't grow, I take down the cross-fencing paddocks in the pasture that I rotate the cows through. Toward the end of the season I noticed that our old solar charger wasn't 'hot' enough. The cows were going right through it without being shocked.
When I pulled it down, I had it shipped off to the manufacturer to see what the issue might be. I learned, to my dismay, that it was more economical to buy a new solar fence charger than pay for the repairs needed to refurbish it. The old fence charger had done its job over the years, but finally petered out. I purchased a new one for a little over $154. I sat it out in the yard and let it charge up for a while and then I strung the portable fence up, hammered in a ground rod, hooked up the wires, and went and got the cows.
| Harnessing the Power of the Sun |
Followed closely by Rosie. Poor Clarabelle, Luna, and Chuck have to stay in the pasture. Daisy and Rosie are still in milk and we give them the best grass so that they'll produce the best milk for us. If you notice both above and below, they both made a beeline for their favorite item on the salad bar - white dutch clover. I left them in the side yard for about three hours and they manicured it nicely. Meanwhile, if you look below to the right of the live oak, you can see the John Deere lawn tractor warming up, ready for duty.
With the "pre-mowing" done, I put the cows back in the pasture, roll the poly-rope back on the reel, pull up the temporary step-in posts and get on the John Deere lawn tractor. Nothing runs like a Deere - or our Jersey cows to white dutch clover.
Sunday, March 5, 2017
In a State of Disrepair
The two eyesores you see below are the two chicken tractors that are in the pasture. They are both in a state of disrepair. I was talking to Tricia trying to figure out when I built them. Tricia keeps detailed records and was able to tell me that the "Ford Eggsplorer" (the laying hen tractor) was built in July 2010. The other, for the meat birds, was built in December 2010.
Although the frame was built with treated lumber, time has not been kind to the rolling wrecks. They've been patched with chicken wire and pieces of tin, some of the wheels are flat. The tractor in the foreground is one that I built for the laying hens and has nesting boxes that you can check from the outside and pick eggs by lifting a hinged door. The one in the background is one I built for the meat birds. They were roughly modeled from Joel Salatin's chicken tractor plans, but with a higher roof to account for Louisiana's hot summers.
But as you can see below, pieces are just falling off of the tractors. The hinged door to the nesting boxes I talked about in the paragraph lies in the grass beneath the dilapidated structure. It is embarrassing to have this in the pasture. They are effectively condemned.
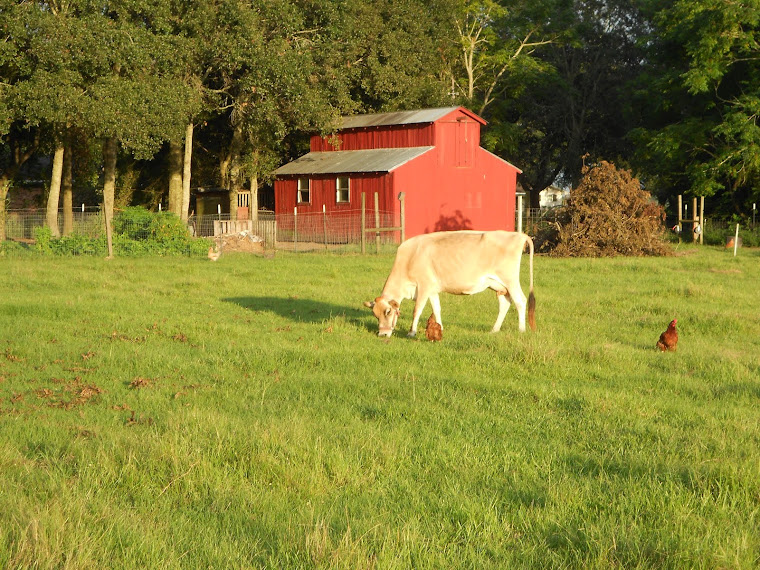
Chickens that used to take shelter and find refuge in the chicken tractors now steer clear of the tractors afraid, no doubt, that they are not structurally sound. Instead they now roost in a hen house that was given to me that you can see in the background to the right of the big red barn. Although them roosting each night in the hen house gives me access to large quantities of chicken poop that I compost and put into the garden soil, I really don't want them in there, except to lay eggs in the nesting boxes.
I really want them roosting in the chicken tractors out on the pasture where I can push the tractors to a new location on the pasture each day, thus fertilizing the grass to grow lush grass for the cows to eat. But these tractors are beyond economic repair and I'll be dismantling them. I need to build new ones and I have scoured the Internet looking for a new design that meets a few specifications.
First, it must be economical to build. Second, it must be durable. Next, and most importantly, it must be lighter. Me and my bride aren't getting any younger and pushing those behemoths across the pasture is enough to give us hernias. I finally found a plan that I want to use. I'll make some adaptations, of course, but we're going to build a prototype and if it works, we'll make a second one. Check in on us in the next week or so as we chronicle the construction of the new, improved chicken tractor!
Thursday, March 2, 2017
Dutch Oven Outdoor Cooking with Benjamin - Pepperoni/Italian Sausage Pizza
Saturday was a spectacular day. We were greeted by a brilliant sun, blue skies, perfect temperature and it was just a great day to be alive. We finished off a bowl of leftover guinea gumbo for lunch and I went out to work a bit in the garden. For some reason I began thinking of when the boys were in scouting and that led me to remember that we haven't cooked anything outdoors in the dutch oven lately. We have a dutch oven with legs on it, specifically for cooking outdoors on a campfire.
I asked Benjamin if he might like to cook something and he said, "Yes!" So we got to researching what we might like to cook and I let Benjamin select Dutch Oven Pizza from Scouting Magazine.
We cut up some parchment paper and aligned it so that it covered the bottom of the pot. Then I drizzled it with olive oil.
Tricia mixed up a batch of pizza dough in the bread maker and let it proof for about 45 minutes. We flattened it out on the counter, forming it into a circle that would fit nicely in the bottom of the dutch oven without touching the sides. We poked it with a fork so that air bubbles wouldn't form.
With dutch oven cooking, one charcoal briquette produces 10 degrees Fahrenheit, so this recipe called for cooking the pizza at 290 degrees. So that means that you would need 29 briquettes in all. I used my chimney charcoal briquette starter and in no time I had the briquettes grey with hot ash. Since hot air rises, you separate the coals, putting 10 coals underneath and 19 coals on top of the dutch oven. In the photo below, I wasn't quite finished moving the coals to the top.
The pizza dough was allowed to bake for 8 minutes.
When the 8 minutes is up, we opened up the dutch oven and spooned tomato sauce on top of the pizza crust and sprinkled some crumbled Italian sausage on top.
Then Benjamin loaded down the pizza with enough pepperoni to clog our arteries.
Finally, he sprinkled almost 3 cups of shredded mozzarella cheese with some Parmesan cheese to the top as well.
We put the lid back on and let it continue to cook for 20 minutes. When the timer went off, we opened the lid and the pizza looked... PERFECT!
We brought the dutch oven inside and set it on the counter and we each grabbed edges of the parchment paper and lifted and the pizza eased right out and onto a cutting board.
We used a pizza cutter to cut it into 4 pieces - two for Benjamin and two for me. Then it was on! Benjamin and I ate that pizza like it was our last meal. In fact, I intended to get a better photo of a slice of pizza, but by the time I remembered to do so, I only had a little sliver of pizza left. We wanted to eat it so fast, but exercised great restraint so as not to burn the roof our our mouths on the steaming hot pizza.
Benjamin wants to institute a new tradition and cook outdoors in the dutch oven once a week. I think that is a good idea. He has his eye on a few different recipes - a few desserts looked interesting to him as well as a jambalaya.
Subscribe to:
Posts (Atom)