Friday, October 31, 2014

Comfrey Comfort

Will Comfrey Provide Comfort?


I have been reading about natural remedies and how people used to treat certain ailments and I thought it would be interesting to experiment.  Before you get the mistaken impression that I'm going to use leeches or engage in blood-letting, let me tell you that Benjamin has been running track and is suffering with muscle soreness.  He comes home from practice complaining and we want to try to help him.

In this post we talked about growing comfrey in our garden back by the compost pile.  In that post we also discussed the healing properties that the leaves have as they contain allantoin, a chemical compound that has positive results in relieving soreness, inflammation, and skin irritation. It has been shown to aid in cell regeneration and help with muscle and joint pain.

So we decided last night to make a Comfrey Poultice.  A poultice is described as being "a soft, moist mass of plant material applied to the body to relieve soreness and irritation and held in place with a cloth."  I looked at several websites and used a combination of "recipes" to make our comfrey poultice.  Here's how we did it:

First, I walked out to the garden and snipped off about a dozen mature comfrey leaves.  Comfrey leaves are large, leathery, and fragrant.  There were a few stink bugs that were on the leaves so I washed the leaves up, sending the stink bugs down the drain and into a watery oblivion.


Comfrey Leaves from our Farmacy
Then I got a sharp knife and chopped the leaves into squares about 1 1/2 inches by 1 1/2 inches.  It really doesn't matter how small, just chop them up.

Chopped up comfrey leaves
Put them all in a food processor and puree.  It doesn't take very long for the leaves to turn into a substance that looks just like pesto, BUT DON'T EAT IT!  Comfrey is toxic if taken internally.  It is just to be used topically.

Comfrey Puree
When it is fully pureed, it will be a little too "liquidy" so get a 1/2 cup or so of flour and throw in there.  The flour acts as a binding agent to firm things up into a dough-like substance.

Adding Flour
Once you use the processor to mix the flour in, you can see that it has a firmer consistency.

Thickened up
Now that your comfrey is processed, you can make your poultice.  I used an old T-shirt that I cut up to fit the size of the sore area on Benjamin's leg.  It runs from just below his kneecap to his ankle, so I had to make a long bandage.  You'll want to adjust the size of this recipe and the cloth to the body part that you are treating. Now use a spatula to remove the pureed comfrey from the food processor and apply to the cloth bandage.

I'll admit, this looks like something you might find in a diaper, but I decided not to judge a book by it's cover and pressed on.

No, this isn't what you think it is!
Carefully take the poultice and apply it to the affected area, ensuring that the comfrey/flour mixture comes in contact with the skin.  I used strips of the T-shirt to tie the poultice in place. 

Healing for a sore leg
Tricia wrapped it further in a trash bag so that the green comfrey juice wouldn't drip on the carpet.  

Heal Thyself!
Benjamin was a good, patient patient!  He allowed us to doctor on him.  You are supposed to leave the poultice on for 4 - 6 hours and he complied.  I called at lunch today to ask if Benjamin had felt any relief as a result of applying the comfrey poultice.  Benjamin said that he thought it felt better but wasn't really sure.

I know that is not a resounding testimonial and certainly not what I was hoping for. We'll try the comfrey poultice again for rashes to see if it has healing effects as allantoin is used in topical ointments and creams for skin irritations.  We'll report back our experiences when we experiment again.

Thursday, October 30, 2014

Random Thoughts about Mud and Hard Work

Last Friday night I watched a movie called "Mud."  I liked the movie, although I must say that I hate the fact that directors must always include strong language that makes almost every movie not family friendly, even movies rated PG, but that's going down a whole 'nother trail that I won't get into at this time.  I realize that makes me seem prudish, and I probably am.  As with most things in popular culture, unless you are a hermit, you are sort of relegated to a 'chew up the meat and spit out the bones' mentality when engaging with a culture vastly different with the one you grew up in.

Mud was an adventure that reminded me an awful lot of a modern day Tom Sawyer or Huck Finn story.  It is set in DeWitt, Arkansas and involves the adventures of Ellis and his best friend, Neckbone.  Southern nicknames are the best.  Everyone needs a friend named Neckbone!  Anyway, and I won't spoil the story, Ellis and Neckbone discover a boat high in the treetops on an island in the Mississippi River that they want to make into a camp.  Upon climbing into the boat, they find that there is already someone who has laid claim to their boat - an outlaw on the run who is named "Mud," and is played by Matthew McConaughey.  Mud needs some help and Ellis and Neckbone agree to help him and the tale develops from there.

Image Credit
As I stated, Mud has a Tom Sawyer and Huck Finn feel to it.  Ellis and Neckbone live on the river in a houseboat that is connected to the levee by a gangplank that rises and falls with the level of the river.  The vast range of the rise and fall of the level of the river seems to be in alignment with the boys' discoveries about love and loyalty, about good and evil.  Because of their hardscrabble upbringing, they grow up fast and are able to do things like clean fish, drive dirtbikes and boats, fix boat motors and work.  Hard, manual work that turns them into men at the age of 14 and they are expected to contribute to the family economy.

Image Credit
One particular part in the movie that made me think was one in which Ellis and his father are having a talk one night about a difficult family situation.  It goes like this:


Senior: You know I love you?
Ellis: Yessir. I know.
Senior: I work you hard 'cause life is work. You know that?
Ellis: Yessir.
The Dad is a tough man and demands a lot of Ellis, but he loves his boy and his boy loves him. That just made me do a lot of thinking.  Thinking about Life and Work and Balance of the two.

We live in a modern culture where entertainment and leisure is highly valued.  Let me correct that, entertainment and leisure has always been valued, but the thing that has changed is work.  In Early America prior to the Industrial Revolution when we were overwhelmingly an Agrarian nation, hard manual labor such as tilling the soil, milking the cows, harvesting the crops was required.  Those things were essential for survival and the entire family was engaged in those roles.  The family was a productive unit.  The productivity was born out of necessity.

The family economy was multi-generational, with older generations and younger ones all working together to provide food for the table and spending money for necessities that could not be produced on the farm.  Family was important and everyone pitched in to help.  Even the youngest children contributed.  Contrast that to many children today that  are looked on as a burden to the family budget and as a result, people have children later - and fewer of them.  But in those days children contributed directly to the family (by providing labor) and large families were common.

Image Credit
The Industrial Revolution brought about change.  Instead of producing things, families became largely consumers of things.  Because of mechanization, farming could be done with fewer people and children became liabilities instead of assets. Family members were sent to work off-farm to earn wages to purchase family necessities.  This displaced people from the land and distanced them from one another.

Although the family economy still exists in some parts of the country, it is largely gone.  I realize that I'm waxing nostalgic about a bygone era - one that I didn't really live in, although I worked on our family farm growing up.  I'm sitting in a climate-controlled room, typing on a computer and I fully appreciate the niceties and conveniences of modern life.  However, I am convinced we are missing something.

We've always given our children chores to do - things that they were responsible for. They were always responsible for doing everyday chores like gathering eggs or feeding the animals.  They were also given extra things to do that were seasonal in nature like harvesting the garden, picking pecans, gathering sticks after a storm or getting hay in the barn.  Work like this is needed on a farm and was expected in normal agrarian family life.

But what about today?  What about when no one else does this?  When kids play travel tournament ball or play video games or sit in front of the TV?  None of these things are inherently wrong or bad, but scooping poop out of the barn is not going to compete with playing on the X-box in the eyes of a child.

And therein lies the struggle for balance.  How in an agrarian lifestyle do you balance the needs of labor with entertainment/leisure?  Although we never deprived our kids of extracurricular activities, we never did as much as other parents did to entertain their kids with full schedules of activities. Will our kids resent us for that?  Will they look back at me like a cruel taskmaster?  Will they look back at their childhood with regret when compared to their peers?  Will they want to have anything to do with farming or the agrarian lifestyle?  Or us?  I don't know.

Image Credit
I'd like to think that they would look back longingly and lovingly with good memories of their somewhat 'different' upbringing - much as I do, but only time will tell.

Although I agree with Ellis' Daddy when he told him that "I work you hard 'cause life is work," there is balance between work and leisure.  Offering our kids outlets for entertainment and leisure while at the same time helping them develop a strong work ethic and maintaining that balance is a critical and crucial endeavor for parents.  Mud was a movie about love and love lost, about dealing with disappointment and hurt, about redemption and about growing up.  Just as the boat high up in the tree seemed to be out of reach for Ellis and Neckbone, finding the delicate balance between fun and work sometimes proves to be the same for me.

Wednesday, October 29, 2014

Did you know that plants can tell when they are being eaten?

I tell you I learn something new every single day.  Plants can tell when they are being eaten and don't like it one bit!

According to this article recent research from the University of Missouri has shown that plants can tell when they are being eaten and don't like it one bit!  As weird as it might seem, the study shows that plants can somehow sense that they are being eaten and put out defenses to stop it.  Here's how it works:

This particular study was on the ever-popular Arabidopsis, specifically the thale cress, easily the most popular plant for experimentation. It’s in the brassica family, closely related to broccoli, kale, mustard greens, and cabbage, though unlike most of its cousins it isn’t very good to eat.
"...researchers had to first make a precise audio version of the vibrations that a caterpillar makes as it eats leaves. The theory is that it’s these vibrations that the plant can somehow feel or hear. In addition, the researchers also came up with vibrations to mimic other natural vibrations the plant might experience, like wind noise."
"Turns out, the thale cress actually produces some mustard oils and sends them through the leaves to deter predators (the oils are mildly toxic when ingested). And the study showed that when the plants felt or heard the caterpillar-munching vibrations, they sent out extra mustard oils into the leaves. When they felt or heard other vibrations? Nothing. It’s a far more dynamic defense than scientists had realized: the plant is more aware of its surroundings and able to respond than expected."
Pretty cool.  Except it has brought up another concern for our Brassicas in our garden: They must be experiencing hearing loss and cannot hear the caterpillars feasting on their leaves.  I am putting off getting a hearing aid for myself, much less getting one for my plants!  The only other option is that our caterpillars have developed a taste for mustard oil.  Regardless, my plants didn't get this memo. Since they can 'hear,' maybe I'll read this study to them when I get home this evening so that they can learn about the internal weapons against pests they have at their disposal.

Munch, munch, munch...
I say all that in jest, but to update the post from the other day, it appears that spraying the plants with Lye Soap spray has worked to discourage additional damage to the leaves.  That is very good news and we'll continue to keep this method in our arsenal against pests that want to eat our food before we do.

It remains warm in South Louisiana as we're still experiencing high temperatures in the mid-80's. The warm weather heightens the bug problems as evidenced in the photograph shown above, but according to news forecasts, we'll have a cool-down this weekend that will send low temps down into the low 40's, the coolest weather so far this fall. We're all anticipating it.

Tuesday, October 28, 2014

Let's Grow

After just finishing getting the final seeds in the ground for the Fall/Winter garden, I'm excited.  I love to plant things, love to watch them grow, and love to eat fresh produce from our garden.  We're harvesting bok choy right now and the kale will be ready in a week or two.  Other items will be coming along shortly thereafter.

I plant a garden for several reasons:

1. It's in my blood: I grew up on a farm and have always loved agriculture.  The rural life, getting dirty, growing things, and caring for livestock has always been very attractive to me.

2. I like being somewhat self-sufficient: I've said it a million times: it is so invigorating to sit down to a meal that came from your land straight to your table.  You were involved from planting to harvest to preparation.  It is nice to not be dependent on the Global Supply Chain for your food.

3. The health benefits pay dividends:  Gardening is an activity that gets you outdoors working in the fresh air.  The produce you grow is devoid of chemicals, additives, preservatives, GMO's, and artificial colorings, flavors and it lacks all the enrichment and processing.  This food is good for you and is delicious!

4. It's a nice hobby that will actually help the family budget:  Over the years, we've been able to reduce money spent at the grocery store and this helps out with family finances.

Although I could post some photos of the garden, instead I'd like to show some infographics that I was able to find on this topic that interested me.  Please note that all of the data is not from the same year, but it is close enough in proximity to still derive meaningful information.  First, the percentage of US Household Income Spent on Food:
Image Credit
Citizens of the United States of America spent about $2,273 or 6.4% of their consumer expenditures on food in 2012 according to the USDA.  To put that into perspective, as a percentage of consumer expenditures, that is less than any of the 83 other countries the USDA tracks.  What does that mean? It doesn't mean that our food is cheaper as the USDA actually says that our food is more expensive. The average amount spent on food as a percentage of all our consumer goods is less than those 83 countries.

While it doesn't go into detail and state this, I think it is expressing what we all know is true.  We live in a wealthy country with many having discretionary incomes that allow us to spend money on lots of things, like consumer electronics, entertainment, clothing, automobiles, vacations, etc.  We are blessed and we have money to spend on other things beside food.

This graph from roughly the same time period gives a frame of reference against other countries.  If you are spending almost half of your household consumption expenditures on food, that doesn't leave much left over for discretionary items.  You are trying to purchase necessities.

Image Credit
We are truly blessed to live in America, but despite the fact that we pay relatively little for our food, who is to say that prices will stay this low?  The drought in California has sent produce and beef prices skyrocketing.  Have you bought a roast or even hamburger meat lately?  For this reason and others, many people are taking food production back into their own hands.

According to This Article 31% of Americans are gardening due to concerns about the safety of the food supply, the fact that homegrown food tastes better, and the ability to save a little money.  That is encouraging news.

But here is my favorite infographic of all. It is full of interesting information. If it is too small for you to see either click the image and it will enlarge or click HERE to bring you to a larger rendering.


The ranking of popular vegetable crops in US gardens was pretty much where I thought it would be, although where's okra?  Okra must be a regional thing! Look at the increase in households with food gardens from 2008 to 2009 - a 19.5% increase.  Most interesting to me was the economics. Americans spent $2.5 billion of seeds and other gardening supplies, but experienced a return on investment of $21 billion dollars.  So for an average garden of 600 square feet, people spent $70 bucks and that investment yielded a $530 return.

The last time I checked, you won't get that rate of return in a savings account or CD!  The numbers in the charts and graphs above are all about five years old.  I wonder how they might compare to today's figures?  There's just too many benefits to growing at least a portion of your own food.  Let's get growing!

Monday, October 27, 2014

Harvesting our first ever Peanut Crop!

Back in March, we posted This Post to show us planting a brand new crop in our garden: Peanuts. We had never planted them before.  We all love peanuts and wanted to try our hand at growing them. Bottom line: We achieved some success and will plan on definitely planting them again next Spring. This past week we harvested the peanuts and as with doing anything new, we learned some lessons that we'll employ next year and I'll discuss those a little later.

Here is one of the peanut plants and how it looked just prior to harvesting.

A peanut plant
We learned that peanuts aren't actually nuts, but are a legume.  While nuts grow on trees, peanuts grow underground.  Even before digging, when I scratched some hay mulch out from the base of the peanut, I saw a peanut and it looked ripe:

Our first peanut
I popped it open and we snacked on the fully developed peanuts.  They were good. Not as good as a boiled peanut or a parched peanut, but good nonetheless, right out of the ground.

Snack Time
Peanuts bloom a pretty yellow flower and once the peanuts bloom, they send a shoot or a "peg" into the ground and the peanut grows off of the peg.  If you look closely below you can see the peg that the freshly dug peanut is growing off of.

"Just-dug" Peanuts
After planting the peanuts, I Googled how long before they will be ready to harvest and the information I read said 120 days.  But it also said that the foliage of the peanut plants will begin to yellow and that is a sure sign that they are ready.  Well... we planted back in late March.  I kept checking and checking and checking and as you can tell from the first photograph, the foliage NEVER began to turn yellow.  We were well past 120 days and so I decided to dig them up.

Here's lesson #1 (at least in my very limited experience with peanut growing): Don't wait until the plants begin to turn yellow.  Begin digging up a few when the prescribed growing days have passed and crack a few open.  If the peanuts inside the shell are fully developed, they're ready.  Digging them up was easy.  I just loosened the soil all around the plant with a shovel (A digging fork might work better), grabbed the peanut plant at the base and gently pulled up out of the loosened soil.  The results can be seen above.

I think by waiting on the foliage to turn yellow, I hurt the yield as you can see that some of the peanuts had started sprouting:

Sprouting peanuts
Here's one that was sending a fantastic root structure right out of the shell.  Too bad we won't get to eat that one.

Healthy looking roots
We only planted one half of a row in our first crop which amounted to about 15 feet of peanuts.  I ran a string from our canoe (The Garfish) and hung the plants from the string.  I'll allow them to hang there and dry for a couple of weeks.

Hanging out to dry
Here is a nice picture of a group of peanuts.  It is an interesting crop to grow as it is different from anything we've tried before and we'll plant more of them next year.

Not too bad for our first try
Another lesson I learned is that peanuts do better with loosened soil or soil with lots of organic material in it.  Next year I'll plant them where the soil is the loosest and will continue to work in lots of compost, leaves, hay and other organic amendments to the soil.


We'll likely roast or parch these peanuts once they are dry.  I'll also save some of the seeds to plant a next year's crop.  We've already seen evidence that the germination is good and these are an heirloom, open-pollinated variety.  Maybe we'll even have a little leftover to make some peanut butter!

Friday, October 24, 2014

From Planting Alliums to Protecting Brassicas

I remember in elementary school learning about the different biological classifications.  We learned a mnemonic device to help us remember the following:

  • Kingdom
  • Phylum
  • Class
  • Order
  • Family
  • Genus
  • Species
I have forgotten the mnemonic device (I think it started with "King Phil") but for some reason can still remember the actual classifications.  Weird, huh?  I can remember that, but can't remember phone numbers to save my life.  If I ever lost my contacts on my phone, I wouldn't know how to reach anyone since I don't need to know their numbers - I just press their names on my phone.

Anyway, onions are in the Allium Genus which include a lot of flowers that grow from bulbs like lilies and also garlic, chives, scallions, and leeks.  Last year I purchased some red onion seeds.  I love red onions.  I planted them all, but did not have any success at all growing them from seed.  This year Tricia picked up some onion sets for me from the feed store.  They aren't red onions, they are yellow, but they'll eat just fine.  I'll educate myself more on growing onions from seed over the winter, but for now, we'll plant these sets.

Onion Sets
Planting onion sets are very similar to planting garlic cloves.  You simply plant them an inch deep and four inches apart, pointy side up, roots down, cover with dirt, water and they'll GROW.

One onion planted...
That didn't take long to get them in the ground.  While I was in the garden, I'll generally pull weeds that are competing and attempting to crowd out our vegetables.  While I was weeding I came across the following troubling sight:

Whoa!
I have a lot of Brassicas planted and every row of my brassicas had damage like you see above. Plants in the Brassica Genus include cabbage, broccoli, Brussels sprouts, and cauliflower.  For some reason a pest really likes them.  They weren't touching anything else in the garden.  We've experienced some success with applying lye soap spray to the leaves of plants that bugs are eating. All we do is grate some lye soap into some hot water to dissolve and then mix a few cups of water to the emulsion and put it in a spray bottle and spray the damaged areas.  So let's get that started.  

Lye Soap Spray
I didn't see at first what the pest was that was feasting on our plants, but while spraying, I spotted one of the perpetrators.  Can you see him?

The culprit!
I plucked the guilty party off of the plant and acting as judge and jury, sentenced him to capital punishment.  The hens were all too happy to be the executioner.  I tossed him over the fence and pretty soon the 'eater' became the 'eaten.'

Guilty Worm
I applied a liberal dose of lye soap spray to the vegetables on the Brassica rows to hopefully 'clean up' the problem and bring an end to the damages.

Leaves with a good application of Lye Soap
I'll diligently check the plants to ensure that we've discouraged additional damages. If this doesn't work, I'll try to go through and physically remove the worms.  I've heard that some people put some chickens in the garden for pest eradication and while I'm sure that works, my experience is that they cause more harm than good by scratching the ground and unearthing roots and eating the plants. 

Thursday, October 23, 2014

Planting Garlic

Garlic is something that we cook with a lot.  We absolutely love the flavor.  We've grown it for several years and have almost perfected growing it, but we continue to have problems with storing it due to the high humidity during the time of the harvest.  Our yield is very good, but we lose an awful lot of our garlic while trying to dry it.

We have tried to put the garlic we harvest on top of fans that continually blow air over it, but when you are blowing hot, humid air, it has little advantageous effects on drying it.  We have brought them indoors right after harvest into a less humid environment, but still have a high loss rate. But we'll keep on trying and I'll be reading lots of information and will be ready for next summer when we harvest the garlic crop we are about to put in the ground.

Tricia purchased six garlic bulbs at the local feed store.  We grow softneck garlic in the South and although they weren't labeled at the feed store, I think this is known as the Creole variety.

"Seed" Garlic
I broke up the garlic bulbs by separating the individual cloves that make up the bulbs.  There were a few bad cloves, but when all of them were separated, I had 80 individual cloves, which equates to about 13 cloves per bulb.  Some were big and some were small, but I've found that most all of them will sprout and eventually grow into a garlic bulb.  According to what I've read, you need to plant them in the Fall so that you are assured of two months of cool weather growth that stimulates 'bulbing.'

Separating out the cloves
I normally plant garlic 4 inches apart, so I made a little guide for Benjamin using a big tent peg by marking four inch increments and using it as a planting guide.  This will keep the planting uniform and accurately spaced.  I had previously worked in a little composted chicken manure into the soil to assist in making the garlic jump out of the ground.

Homemade Planting Guide
We dug slight indentations one inch deep and placed each garlic clove in the hole, pointy side facing up, and covered the garlic so that the very tip was just covered with dirt.

Planting Garlic
Here is a view of part of the garlic row all planted with the cloves in the hole.  We planted them in rows of three.  I like them planted like this because you can straddle the row when harvesting them.

All the cloves are planted
Benjamin followed as I dug the holes with a knife and dropped the cloves in each hole and then he brushed dirt over them to cover them up.  In no time, we were done. 

Sometimes you just have to get your hands dirty
A day after we planted, I drug the water hose across the pasture and thoroughly watered the garlic row, hoping to imitate a good rainfall.  It has been pretty dry in October.  As the garlic grows, I'll mulch heavily between the growth with hay to discourage weed growth that competes with the garlic for soil nutrients.

Now that the garlic is planted, I have 7 or 8 months to read up and learn on how to store garlic better! This year we will hopefully have better results in garlic storage.

Wednesday, October 22, 2014

October Weather - Windows Open!

October weather is always spectacular.  We get our first cool fronts that push the muggies out into the Gulf of Mexico and the temperatures range from the 80's during the day to the 50's at night.  We've taken the opportunity to pull our screens out of the attic and put them on the windows and then open up the windows on opposite ends of the house and let the breeze blow through the house.  We wouldn't try that during the summer because we'd be soaking wet with sweat due to the heat and humidity of our locale.  We wouldn't try that without putting the screens on the windows because we'd be carried away by the mosquitoes!

Opening the windows and 'airing out' the house is so pleasant.  The cool breeze is refreshing and brings a nice, clean smell into the home.  I was reading the other day about how our homes these days are so insulated and sealed up that it creates an unhealthy environment and actually can make us sick. The author of the article was talking about how she opens the windows each morning to allow fresh air to blow through her home and pulls back the comforter to freshen her sheets each day. Unfortunately, we don't live in an area where you can do this except on rare occasions - October is usually one of those months.

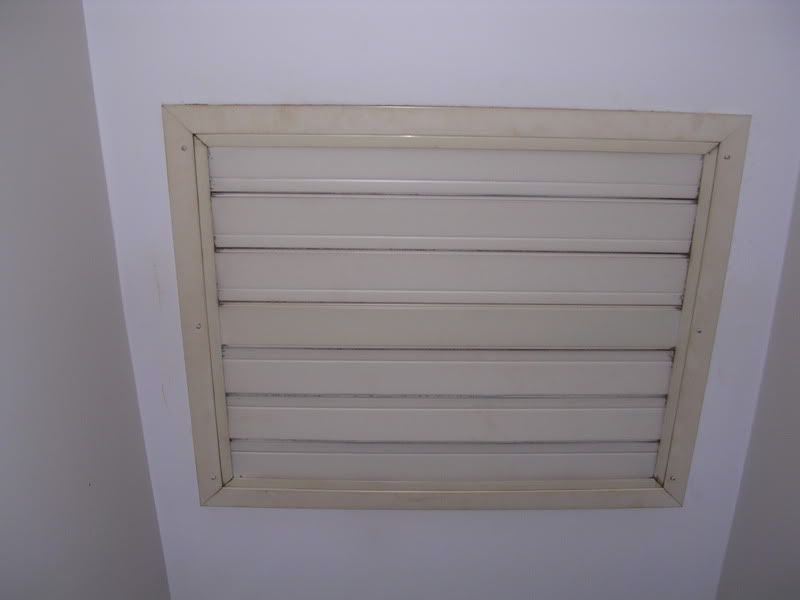
As I was reading that article, it prompted me to remember something that I hadn't thought about in years - an attic fan.  My grandmother and grandfather (we called them Bumby and Poppy) had an attic fan in their house.  I haven't seen those installed in any other home around here that has been built recently.  I guess this was mainly a thing in older homes?  I recall that thing being so effective in pulling a breeze through the house.  Right inside their front entry-way, in the ceiling between the living area and the attic, was a louvered grate that looked somewhat similar to the photo below:

Image Credit
They would lift the windows and turn that thing on and it would make a rumbling noise and then the air would circulate through the house, creating a stiff breeze!  If I recall correctly, it was called an attic fan, but the real term for it was the Whole House Fan.  If I read correctly, an attic fan just exhausts the hot air in the attic out to atmosphere, whereas a whole house fan is used instead of an air conditioner to move a whole lot of air throughout the home.

During the day you keep the windows closed and at night the outside temperature and humidity drops, so you open the windows and turn the fan on.  This forces air in the house up through the attic and out, drawing cool air from outside into the home.  It is more economical to run this than an air conditioner and depending on the outside temperature, you'll want to have a quilt handy because it gets mighty chilly!  While we don't have a fan like Bumby and Poppy did, opening the windows on opposite ends of the house is the next best thing and brings refreshing air circulation into a house that has been sealed up all throughout the preceding summer months.

Anyway, while we're talking about attic fans, or whole house fans, it reminded me of one quirky thing that I used to do without fail every single time I passed it.  Do you remember the pull-down stairs that lots of people have in their homes to get into the attic?  We don't have one because we have an entry door to our attic, but some people have the string that you pull down in the ceiling that reveals a fold-out ladder.  The string has a little white, plastic end piece that looks kind of like the top to a bottle of Elmer's glue, like shown in the photo below:

Image Credit
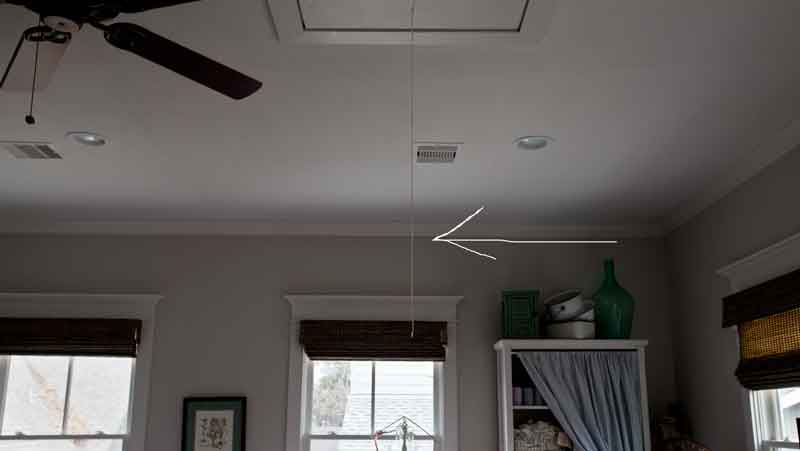
The string with the end piece hangs down like shown below and always seemed to beckon me to jump up and hit it with the tips of my fingers.  (This is probably documentation of some sort of a mental disorder, I'm sure.)

Image Credit
I don't know why, but as a kid every time I passed by it, I would jump up and hit it with my hand. Like a moth drawn to a flame, I'd hit it every time.  Is this just me or did anyone else do this?  If I had a dollar for every time I did this, I would be able to retire tomorrow.

Tuesday, October 21, 2014

Mulching our Fall Potato Crop

I wanted to do a little update on our Fall Potato Crop.  For the first time ever, we're trying to raise a Fall Crop of Irish Potatoes that will replenish our potato inventory from the Spring crop.  We harvested the Spring Crop of Irish Potatoes back in May and I think we only have about 8 scrawny ones left in the bottom of the bin.  But that's okay.  We had a bumper crop this year and they have stored well throughout the summer.

We picked out a few from existing inventory that were shriveled up and had some nice sprouts on them and planted them in a 12 foot bed.  I didn't want to go overboard, because goodness knows, we'd rather eat them than put them in the ground if the frost is gonna get 'em.  They all sprouted and are looking mighty healthy. Now that they are up out of the ground, I want to be sure to get some mulch around them to discourage weed growth and conserve soil moisture.

That's where an old hay bale comes in handy.  Bales of hay that are more than a year old can often be found in the corner of someone's pasture, decomposing and shrinking back into the land from whence it came.  I like to cut the baling twine off of it and use it to thickly mulch around all the vegetables in the garden, whether in Spring or Fall.  I break off swaths of hay from the bale, trying to leave it in long pieces that I'll lay across the ground as sort of a mat.

A wagon full of year-old hay
And here is the row of potatoes that we planted and posted about on September 24th in This Post.  They stand about 10 inches tall right now and a relatively dry October has the soil dried out.  You can also see a few weeds creeping up that will compete with the potatoes if we don't do something about them.  I hate weeding.  Mulching is much easier.

A row of Fall Potatoes
I laid the hay around the potatoes like you'd pull a heavy quilt over you on a cold winter's night. With the potato plants all tucked in, we're good to go.  Irish potatoes take between 90 and 120 days until they are ready to be dug up, so that means that somewhere between December 23 - January 22nd, they'll be ready.  We'll have some frosts before then, so I'll pile more hay on top of the plants on those days to see if we can get some more potatoes before the frost kills them.  It is a gamble, I know. We'll see how it goes.  

All tucked in bed
They are very healthy, happy potato plants right now.  I'll give them a good sprinkling of water and the hay mulch will retain that moisture and slow the evaporation that you experience from bare ground.


Since we had success storing our potatoes throughout the summer, next year I'm going to plant more potatoes so that we maintain a strong potato inventory year-round.  If the Fall potatoes are successful, I'll begin growing my own seed potatoes for the Spring crop.  Right now all is looking good.

Monday, October 20, 2014

The 2014 Sweet Potato Harvest

Every year in October we harvest sweet potatoes in our garden.  The coolest thing about this is that we never planted sweet potato slips.  Ever.  They come up on their own each and every year and the vines stretch out and totally cover about a 25 foot by 10 foot area.  They are sort of like weeds in that you don't have to plant them, they just come up every year.  The best we can figure is that the sweet potato crop started from a composted sweet potato many years ago - the gift that keeps on giving!

The vines reach out and grow and intermittently extend roots into the ground which become the sweet potato tubers that we love to eat.  The vines are full of moisture and when broken, emit a milky white 'sap' that must be sweet, because the cows gather around the garden fence to eat them up as we throw the vines over the fence. It's like the cows look forward to the day we harvest sweet potatoes each year because they bunch up by the fence and beg.  Truly funny to watch!

Sweet Potato Vines
So I got a couple of buckets and a shovel and hollered at Benjamin and Tricia to come help me unearth the sweet orange treasure that lay just beneath the surface in our garden.  We pulled back a portion of the vines, cut them and through them over the fence to the cows and then dug up the entire area, being very careful to not cut up the sweet potatoes, but gently dig around them.  Benjamin always likes to sort through the dirt and find them.  The sweet potatoes range in size from very small to gargantuan.  The small ones we feed to the cows and listen to them crunch them up with their teeth and gums.  The bigger ones go into a bucket for us!

The first sweet potato of 2014
As we toss the vines over, the girls make quick work of the sweet, moist leaves and vines.

Cows gotta eat, too.
Here is a beautiful sweet potato.  It's always exciting to pull a nice one like this out of the ground. We place them in buckets and marvel as the buckets fill up.

A good one
And here is another good sized sweet potato.  You can see some of the other smaller ones around it and see how big this one is in relation to Benjamin's hand.  This year's crop enjoyed beneficial, timely rains which allowed the vines to run and the ground to stay moist.  The vines shaded out all competing weeds enabling a good crop to grow, but you never really know what you've got until you start digging.


A nice, fat sweet potato!  Sometimes the potatoes get too big and this results in a sweet potato that is a little hard and 'stringy.'  Fortunately, all of them were of good size this year - not too big, but just right.  The little roots you see just over the sweet potato are the roots that the cows love to eat.  Some of those get left in the ground and I'm sure that is what becomes next year's sweet potato crop.

Can't wait to eat this one
We've learned not to wash them once we're done.  We merely hang them in an onion sack in the garage where there is good air flow around them and allow them to cure.  According to an LSU AgCenter pamphlet, sweet potatoes aren't very moist or sweet when they are first dug.  They have to be cured for six to eight weeks to achieve maximum sweetness.  Curing allows the cuts in the tubers to heal and further develops the sugars.

Curing Sweet Potatoes
Once cured, they can be stored for months in a cool, dark place.  We'll store them, but most importantly, we'll eat them - mostly by making sweet potato fries, mashed sweet potatoes, and sweet potato pie during the holidays.

And here is the 'after' photo once all the sweet potatoes have been dug, leaving barren ground that will soon be planted in turnips.  We'll eat a few of the turnips, but they are mostly for the cows to eat on in the winter.

The end of the harvest
I'll add some composted chicken litter to the soil to replenish the nutrients that the sweet potatoes used and then we'll plant a new crop so we always have something growing.